Skip to Content

blog post

What is furikake?

I wanted to take a moment to formally introduce you to a staple of my spice cabinet that I’ve mentioned here a few times and tell you a little bit more about it.

Furikake. So, what is it?

Furikake is a popular Japanese condiment used mainly as a seasoning for rice. There are dozens, if not hundreds of varieties of this stuff available and there are really no rules as to what they should be made up of. The usual suspects include toasted sesame, bits of nori, bonito flake, dried vegetables, dried egg or other proteins, puffed and toasted rice, and usually salt and spices.

The two we have currently are a noritamago flavor and a katsuo mirin flavor.

Noritamago and Katsuo Mirin furikakes

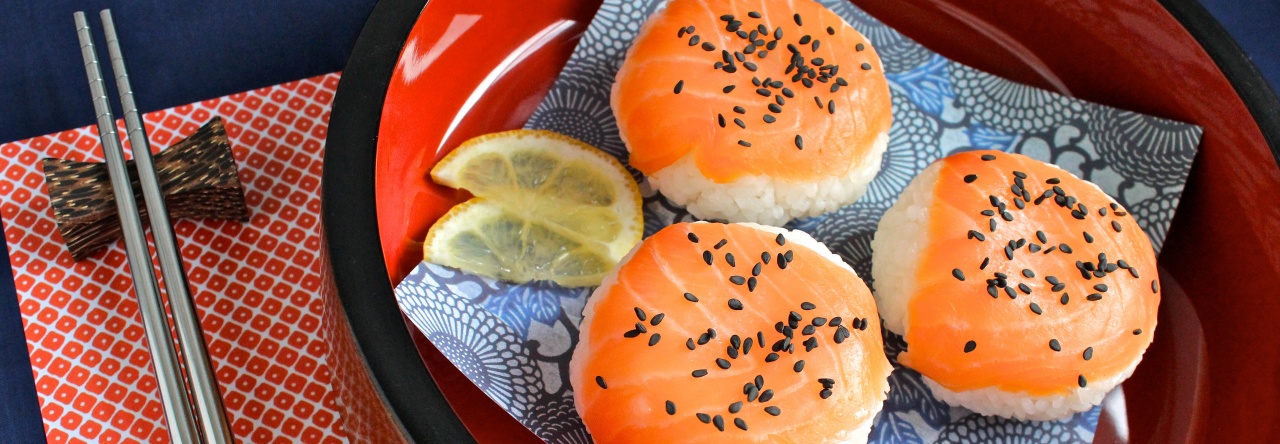
Noritamago is a combination of the words “nori” and “tamago.” You know nori as the dark green seaweed sheets used to wrap maki sushi. In this furikake, the nori is cut into tiny pieces and serves as the salty element. Tamago is the Japanese word for egg, and this furikake contains lots of dried egg bits. There is also toasted sesame and a tiny bit of bonito flake in there too.

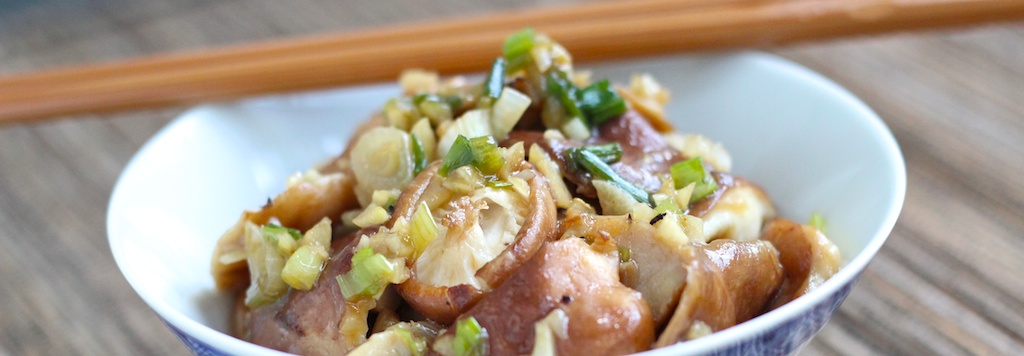
We like to eat this on top of plain rice, on fried rice, and sometimes mixed into plain rice and pressed into a ball to form what is known as an onigiri.

Noritamago furikake

That one is definitely Jeff’s favorite as he isn’t as in love with bonito as I am.

But for all you dried and shaved skipjack tuna fans out there (anyone?) this is the one I recommend for you!

Katsuo Mirin furikake

Katsuo is the Japanese name for the fish known in most other parts of the world as bonito. We call it skipjack tuna in the states, I don’t know why it has so many names. In Japan, katsuo is dried whole and then shaved into a product called katsuobushi. It looks a lot like sawdust and smells like dried mushrooms with a faint oily fish smell. It’s a critical component in making dashi, the popular seaweed stock used ubiquitously throughout Japanese cuisine.

It is also a popular ingredient in furikakes. The one above is mostly katsuo flavored with mirin and soy sauce and accented with toasted sesame seeds and just a few flakes of nori. The flavor is a balance of salty and savory, with the soy seasoning the earthy dried fish.

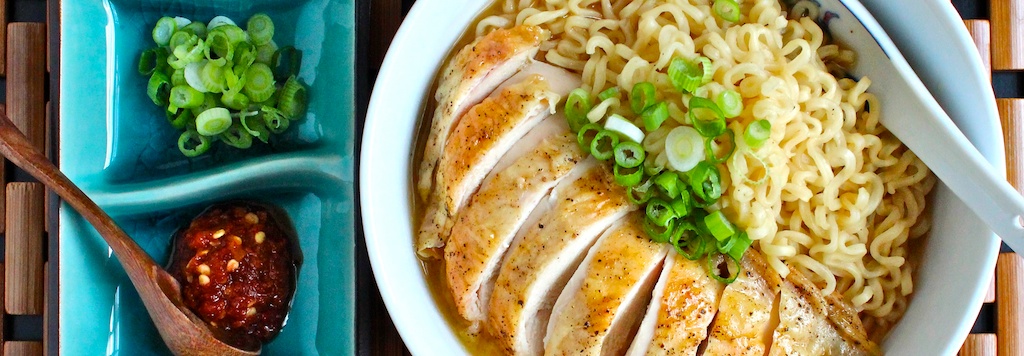
I eat this on plain rice or in an onigiri, but every once in a while I’ll sprinkle it on a bowl of noodles too.

So, if you ever come across this stuff on one of your grocery shopping ventures, now you know what you’re looking at. With so many variations out there, I’m sure there’s at least one that fits your tastebuds exactly. Give it a try, it beats plain rice any day!

What is your favorite seasoning or spice?

blog post

How to season a Yixing clay teapot

Now that our new little lady is safely home with us after her long journey here from China, she must be successfully seasoned before she can be used to brew pu-erh tea. New teapots are often coated in a thin layer of wax, but even the ones that aren’t can have some rough spots and loose sediment that needs to be removed so that you don’t end up drinking it.

Seasoning is about more than just making sure your new pot is clean though. Yixing clay is a porous material that over time will absorb oils from the tea leaves brewed within it. This is a good thing. It is said that after using your pot regularly for 15 years, you should be able to brew tea in it with just the residual oils and flavors imbued in the pot itself, without adding any leaf at all!

So, in a way, seasoning a new teapot is much like seasoning a cast iron skillet. You want it to soak up the flavors from what you put in it, gradually building up more flavor and character within the vessel that over time can contribute to a more roundly flavored tea.

You start by lightly scrubbing the pot with something soft but still mildly abrasive. I’ve even read of using toothpaste and a toothbrush to do this, but Jeff and I were afraid that the toothpaste might somehow flavor the pot so we went with just this textured tea towel instead.

Cleaning new Yixing

When she’s nice and scrubbed, it’s time for the spa treatment!

The pot needs to be boiled for about 30 minutes with a teacloth to keep it from rattling around. Rinse the teapot in warm then hot tap water for a minute or two before plunging it into the boiling water to avoid causing cracks from the sudden temperature change. I like to make separate compartments for the pot and lid so that they don’t rub up against each other.

Cushion Yixing while boiling

Cover up with the teacloth and let it do it’s thing for 30 minutes. Then turn off the heat and let it cool down for another 30 minutes before taking it out, again this is so that you don’t subject the pot to sudden changes in temperature.

Boil Yixing teapot

Just let it dry completely on a rack so that it gets good air circulation all around it. When it’s completely dry you can move on to phase two.

Dry Yixing after first boiling

The next step is basically the same as the first, but this time you’re gonna boil the pot in the type of tea you intend to use it for.

Here I am unwrapping my new bing for the first time!

Unwrap pu-erh bing Unwrapped pu-erh bing

It’s dry and tightly packed, so we used a knife to carefully break the tea apart.

Menghai 7542 pu-erh bing Breaking off some pu-erh tea leaves

You need about 2 tbsp. worth. We let Lucas “test it for quality.” He quickly realized that this was not food and therefore of no interest to him.

Leaves broken off Lucas sniffing tea leaves

Waiting for the water to come up to a boil and then pouring the tea straight in.

Wait for water to boil Add tea leaves to boiling water

It takes less than a minute for the leaves to unfurl and start releasing their clouds of sweet and smoke-smelling liquid.

Pu-erh tea in seasoning pot

Just tuck away your pot and lid within the folds of the tea towel as before, and cover.

Add Yixing to boiling tea

I’ve heard so many different theories as to how long you should boil the pot on the second pass. All from 20 minutes, an hour, 3 hours, and even letting it sit for a week! Jeff and I decided that a half hour was sufficient for opening the pores and allowing them to be refilled with the warm tea oils.

Cover and boil Yixing in tea

Lucas finds this whole process thrilling, can’t you tell?

Waiting while Yixing boils in tea

Well here she is after her bath, not ready to let go of the memory of it. See, she took a souvenir!

Can you see the difference in smoothness? It’s a bit hard to tell in pictures. Holding it in your hand though it should feel almost like skin, smooth and lightly oily.

Fully seasoned Yixing teapot

That’s pretty much it. This teapot is ready for service now.

Like I said, this one will only be used for brewing pu-erh teas. Jeff already has a slightly larger Yixing pot that we only use for Chinese black teas. You don’t want to mix teas between pots because the oils in the leaves will add to the flavor of the pot over time and can ever-so-slightly alter the flavor of the tea you are drinking.

It is important that your teapots stay in monogamous relationships with the type of tea they were “married” to during seasoning so that the flavor of the pot and the tea can compliment and enhance each other. A pot and its tea are like soul-mates; they can never be separated, they bring out the best in each other, and the relationship gets even better with age!

blog post

No-bake chocolate jam tarts

I realize that this is a recipe that would have made a lot of sense to post on or before Valentine’s Day, as it would make for an easy but decadent treat to whip up for your sweetheart.

I assure you though, these little beauties are just too good to relegate to but one day of the year.

No-bake chocolate jam tart

No-bake chocolate jam tart close up 2

Now, I am typically not a jam-lover. I will choose the “quadruple-chocolate white chocolate chip with macadamia nuts and lugnuts and madness cookie” any day over some ole’ jam-studded thumbprint cookie. But for a tart, well to me a tart needs fruits to really be a very good tart at all, and so for these sweet little tart babies, only jam would do.

No-bake chocolate jam tart sideNo-bake chocolate jam tart bite

You can’t very well have a tart without a crust though! I made this simple rawish chocolate crust pretty quickly in my food processor:

  • 1/2 cup raw cashews
  • 1/2 cup raw almonds
  • 1 tbsp. + 1 tsp. cocoa powder
  • 1 and 1/2 tsp. agave nectar
  • 1 and 1/2 tsp. chocolate almond butter
  • 1 tsp. coconut butter
  • less than a pinch of salt

Just blitz the nuts first til they’re teeny, then add everything else and blitz again.

After pulsing nuts

Nuts plus chocolate ingredients

I used a mini muffin pan to mold my tart shells. First, I sprayed the pan with non-stick spray then added little strips of wax paper to the bottom so that I could use them to pull the completed tart shells out later.

Tart shell mix in mini muffin pan

I put heaping spoonfuls of the mix into each cup and came up with enough for 14 shells. Just press the mix tightly into the bottoms and press up the sides, then press around the tops to make them smoother. Make sure to press them very tightly so they hold together.

A little dollop of jam goes in each, then a bit of chocolate almond spread tops it off.

Jam in tart shells

I used Crofter’s jam and the same MaraNatha spread that I used in the crust (and on my toast some mornings.)

Dark chocolate almond butter and Crofter's jam

Biting into one of these for the first time had my eyes rolling back into my head!

Sooooooo…..insane!

No-bake chocolate jam tart close up

I started off wanting to make a raw dessert but the almond butter and jam are not raw ingredients.

You could absolutely make a raw dessert out of this though by filling the cups with something like mashed bananas with cinnamon or maybe a raspberry cashew cream. You’d need to replace the chocolate almond butter in the crust too, not sure what I’d use there though.

Raw or not, I’m really proud of these.

No-bake chocolate jam tarts

Simple chocolate jam tarts in easy molded no-bake shells.

Prep Time: 20 minutes

Yield: About 14 tarts

Ingredients

  • 1/2 cup raw almonds
  • 1/2 cup raw cashews
  • 1 and 1/2 tsp. agave nectar
  • 1 and 1/2 tsp. chocolate almond butter
  • 1 tbsp. + 1 tsp cocoa powder
  • 1 tsp. coconut butter
  • less than a pinch of salt
  • jam and chocolate almond butter for filling

Cooking Directions

  1. Pulverize nuts in food processor.
  2. Add other ingredients and pulse to incorporate.
  3. Mold crusts in a mini muffin pan and set in freezer to harden.
  4. Fill with jam and top with chocolate almond butter.
  5. Store in refrigerator.

What kind of filling would you use in these little tarts?