One thing I’ve learned about pregnancy is that regardless of the weather, you’re hot all the time. I’m a bit embarrassed to admit just how much gelato I’ve consumed in the last few months. Enough to build a slip ‘n slide for a penguin, probably.
After rolling out of the hot bed in the morning, taking a hot shower, putting on hot clothes, and drying my hair with my portable hot-blasting device, I want nothing less than a hot breakfast to top it all off. I caught myself one morning, over an already cool enough bowl of fruit and yogurt, wishing that I could have the same thing for breakfast only frozen. My eyes nearly popped out of my head as I realized that this was a wish I could easily grant myself. And so, I sought to make myself a batch of healthy breakfast popsicles…
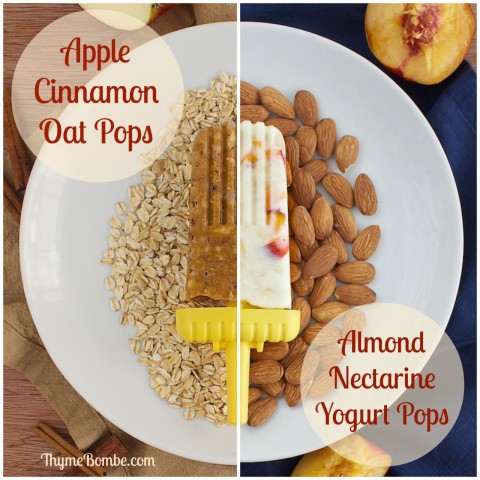
This is stuff I already eat for breakfast regularly, just in frozen form. A bowl of oatmeal with mashed banana and applesauce or fruit and nuts in creamy yogurt. Entirely healthy and so, so soothing in the summer heat.

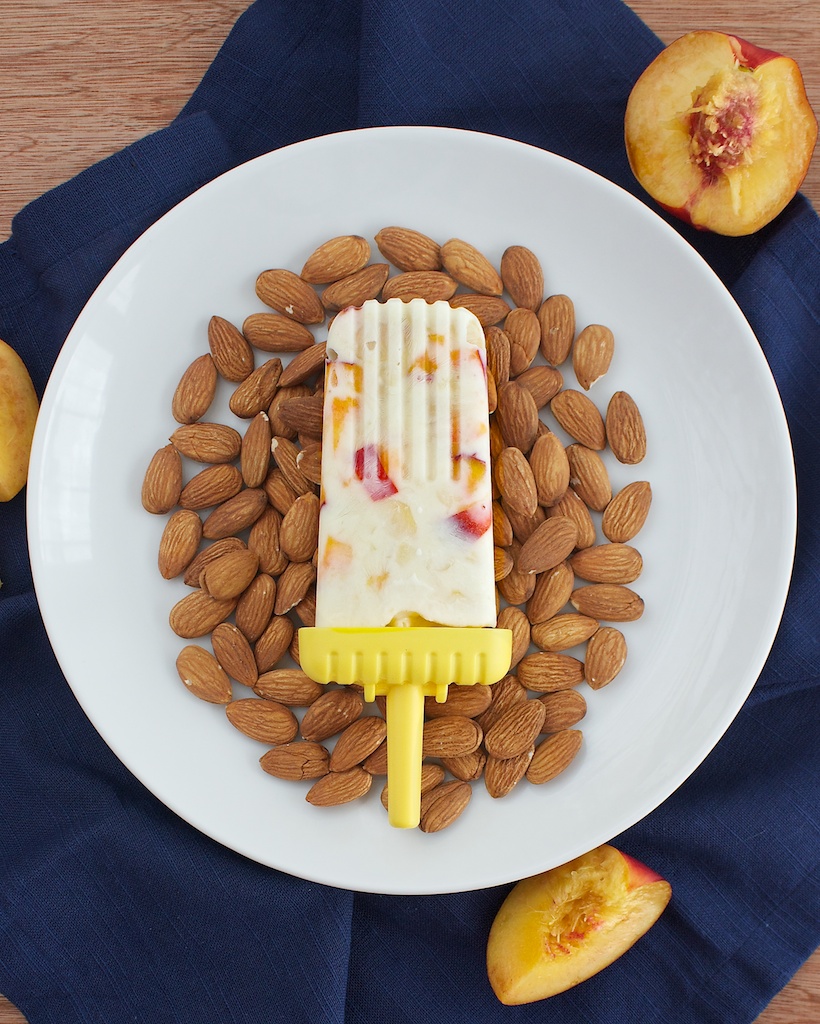
I chose almonds and nectarines for these yogurt-based popsicles because that’s what I had on hand (and because I’m having a bit of an almond obsession right now.) Feel free to substitute any fruit, nuts, or flavored yogurt that you wish, but this combination really was stellar and I found myself making another batch immediately after I inevitably ate all of these in just a few days.
Almond nectarine yogurt pops
Yogurt, fruit, and nuts makes a healthy breakfast that is refreshing when frozen.
Prep Time: 10 minutes
Total Time: 10 minutes
Yield: Makes 6
Ingredients
- 2 containers (12 oz.) lemon Chobani yogurt
- 2 small nectarines (diced small)
- 1/2 cup sliced almonds
- 2 tsp. honey
- 1 tsp. almond extract
Cooking Directions
- Stir all ingredients together in a small bowl.
- Spoon mixture evenly into popsicle molds and insert handles.
- Freeze for at least 4 hours or overnight.
- To eat: Run mold under warm water until popsicle slides out easily.
Another favorite of mine is oatmeal bulked up with a mashed banana and sweetened with applesauce. I was worried that the texture of the oatmeal wouldn’t work very well frozen, but they came out just delightful. They’re a bit chunkier than the yogurt pops, but still break apart easily and dissolve in your mouth.
Again, chose your own adventure here. If there’s a flavored oatmeal you’d like to use, go for it. If you’d like to substitute jam or nut butter for the apple sauce, be my guest. You could even use canned pumpkin in place of the mashed banana… mmmmm.
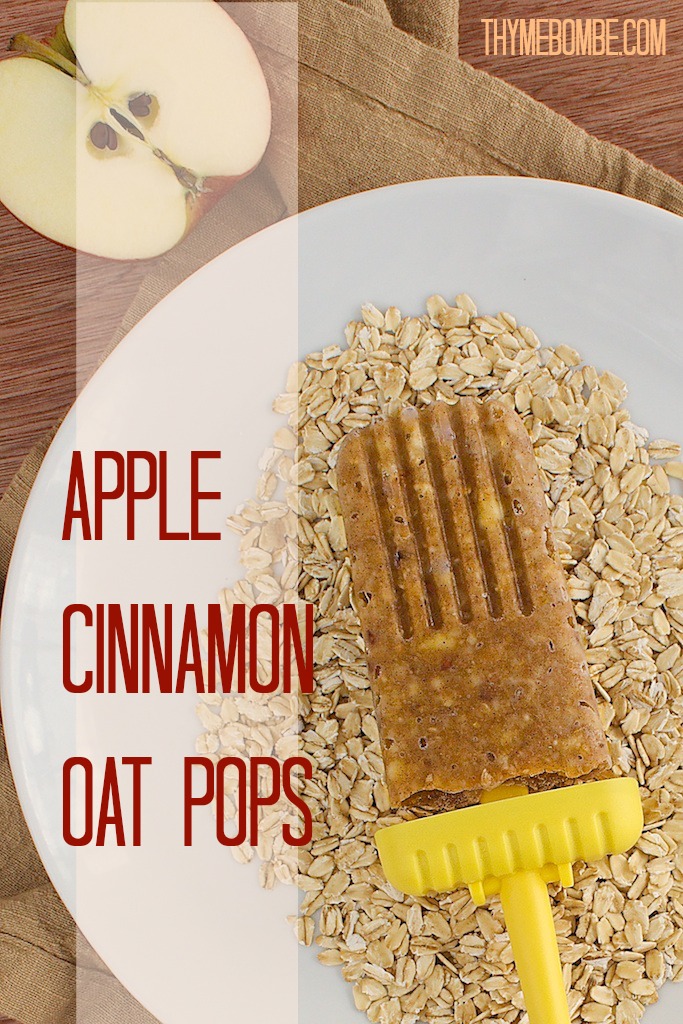
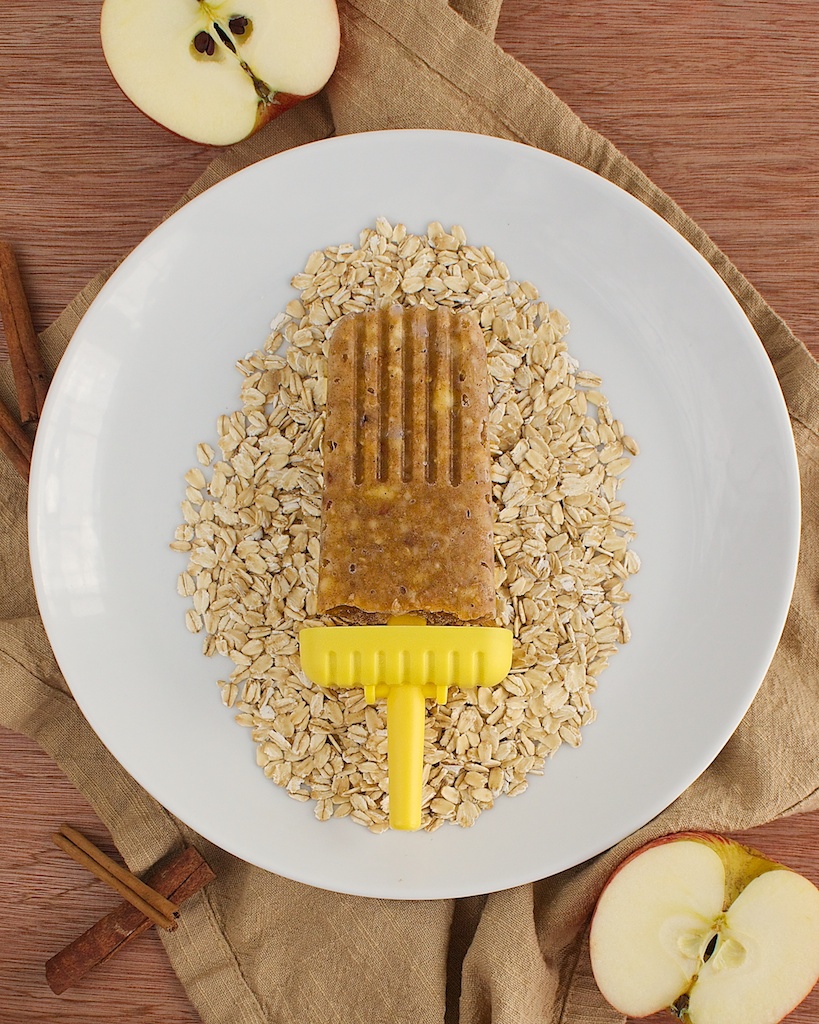
Apple cinnamon oat pops
Just like a hearty bowl of hot apple cinnamon oatmeal, but in frozen form.
Prep Time: 10 minutes
Total Time: 10 minutes
Yield: Makes 6
Ingredients
- 2 individual packets plain instant oatmeal
- 1 medium banana
- 1/4 cup apple sauce
- 1/4 cup almond meal
- 1/4 cup almond milk
- 1 tsp. cinnamon
- 1 tsp. honey
Cooking Directions
- In a microwave-safe bowl, cook oatmeal with water according to package directions.
- In a separate bowl, mash banana with a fork. Add oatmeal and all other ingredients and stir to combine.
- Spoon mixture evenly into popsicle molds and insert handles.
- Freeze for at least 4 hours or overnight.
- To eat: Run molds under warm water until popsicle slides out easily.
I’ve loved being able to grab one of these in the morning to cool off with. They’re pretty low-calorie, so I usually follow them up with a muffin or something. I already have so many ideas for how to freeze more of my breakfasts now. Blueberries and waffle bits in maple yogurt? YES.
How would you translate your favorite breakfast into a frozen treat?