Skip to Content

category

Category: Discussion

post

7 links

So glad Kristy tagged me to do this fun 7 links post that’s been circling the blog world. I’ve had so much fun reading through old but notable posts on other blogs and it was fun to have a reason for me to look back over some of my own.

My 1 year blogaversary is coming up next month, so this is a good time to look back on where I’ve been over the last year…

The Goal

To unite bloggers in a joint endeavor to share lessons learned and create a bank of long but not forgotten blog posts that deserve to see the light of day again.

The Rules

  • Blogger is nominated to take part.
  • Blogger publishes his/her 7 links of his/her blog – 1 link for each category.
  • Blogger nominates up to 5 more bloggers to take part.
  • The best posts from participating bloggers will be posted on the Facebook, Twitter, and Blog at #My7Links

Most Beautiful: Honeymoon part 2: Kyoto

I decided to go with the most visually beautiful post because I don’t tend to write “inspriational” or “motivational” posts, which I think is what was intended for this category.

When Jeff and I honeymooned in Japan, Kyoto was the place that was burned most deeply into our hearts. It was rainy and gloomy for the entire 4 days we were there, and yet Kyoto was made even more beautiful by the cold quiet fog hanging in the air around us, by the clouds of mist draped low over the verdant mountains, and by the Kamo-gawa river full of rain and life making it’s rushing music just outside the window where we slept.

While Japan was certainly a new world for us full of confusion and curiosity, there were a few brief moments in Kyoto while walking along the Kamo hand in hand that both of us felt like we’d been there our entire lives and never wanted to leave. I still miss that misty place.


Most Popular: Kevin and Ashley’s wedding

Fade edge wedding cake

It was the culmination of a week-long foray into wedding cake baking. I was so honored that my brother-in-law Kevin and his now wife Ashley asked me to bake their wedding cake for them, the only problem being that I had never baked a wedding cake before and was completely unfamiliar with some of the tools and techniques it takes to make it all happen.

I watched countless YouTube videos to learn each little part that I’d never tried before and spent hours practicing to make sure I could actually deliver what I’d promised. I can now say that I feel absolutely confident that I could do this again, and even better now that I’m more familiar with the process.

It made me so happy to see everyone following along with me during my epic cake baking week and the responses to the finished product were huge!


Most Controversial: Decatur Craft Beer Festival

I got some flack for this one after I posted a link to it on a local Decatur blog. Although I appreciated the hard work and countless volunteers that went into making this festival happen, I just really didn’t enjoy it. Decatur has an amazing beer culture and I expected a better festival here, so my criticisms came from a place of pride in my town rather than lack of appreciation for it. Still, I had many angry locals slamming me for saying negative things about their beloved beer festival, not just on my blog but on the blog I posted my link to. I still stand by my assessment though and I’m glad I was honest about it.


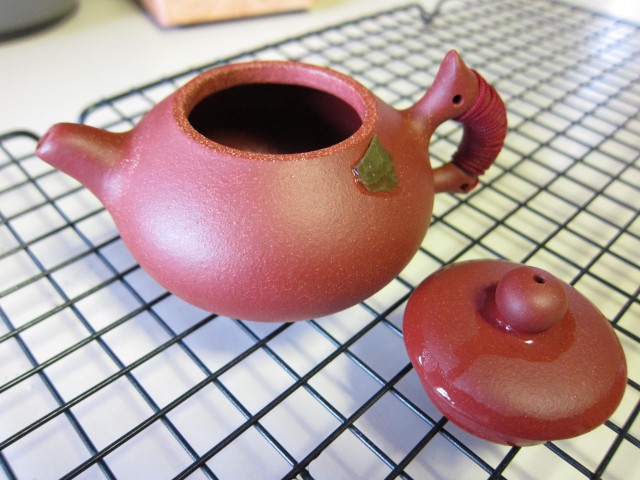
Most Helpful: How to season a Yixing clay teapot

Fully seasoned Yixing teapot

I have a couple of “how tos” on the blog but this one is the one I’m most proud of.

Jeff and I are both tea nerds and have started a small but growing collection of authentic teaware. We’ve learned a lot about how to care for these items and how to use them to their greatest potential. Anytime a new pot enters our home it needs to be seasoned, much like a cast iron pan, to allow it to brew it’s best cup of tea. We had fun learning all about how to achieve this with the pot you see above, a Yixing clay beauty that we use exclusively for brewing pu-erhs (aged and fermented Chinese black teas.)


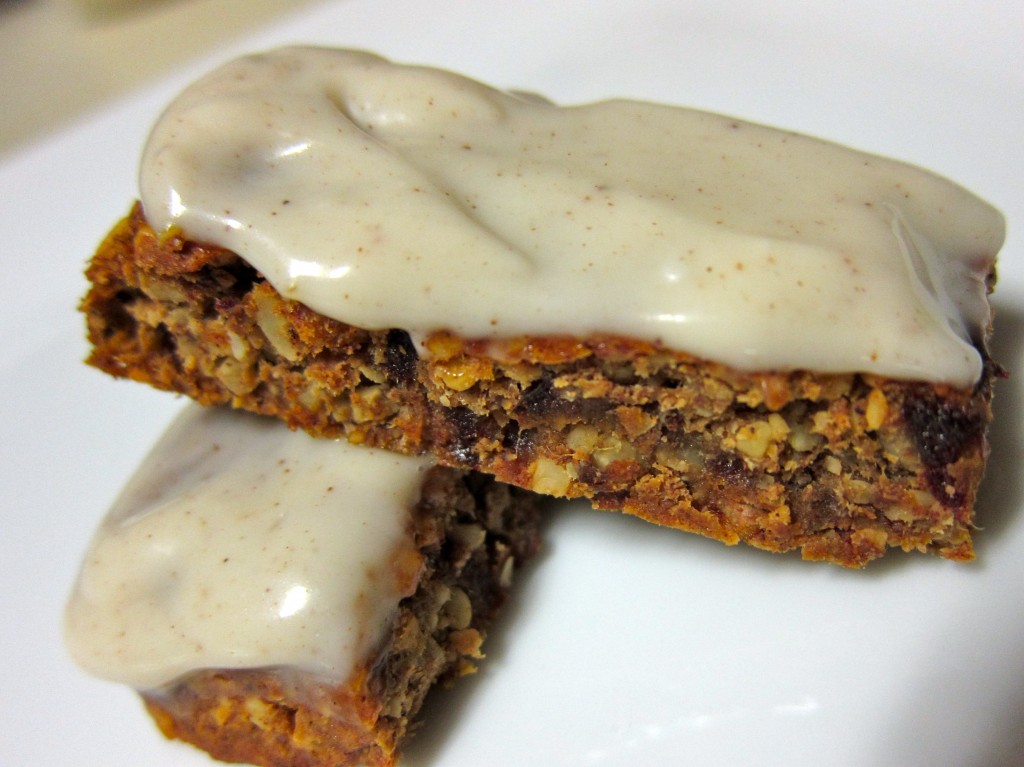
Surprise Success: Apple bars with cinnamon “cream cheese”

I created this recipe during a month of vegan cooking. I wasn’t really sure what I was making when I started, I think I was going for a raw bar but they wouldn’t hold together so I baked them. A Toffutti “cream cheese” icing topped them off and surprisingly they ended up delicious. Not bad for a total experiment.

The bars were a surprise success even back when I made them, but they skyrocketed when Angela of OhSheGlows featured them in her Recipe Link Love series. After that they got shared on a couple of sites around the web and to this day they’re still my most viewed recipe.

I only wish that my photography had improved by the time I made these, it pains me a little to see such terrible photos representing my blog around the web. Oh well. :)


Not Enough Attention: Cold cure drink to kick the sick

Every time I or Jeff get sick I make this drink to nurse us back to health. Seriously, it completely knocks out a cold in 2 days if you make a ton of it and sip at it constantly. It has worked for me every time.

I’ve brought it up again a few times on the blog and recommended it to sick blog friends, but I don’t think it’s ever really gotten the attention it deserves. This stuff is magic people, you have no idea!

One reason that I think no one ever makes it is because it has so many ingredients, and if you’re sick you’re not in the mood to go out and get them if you don’t already have everything. So I’ll say this: The ginger and cayenne are the most important. If you have nothing else, those two in hot water or your favorite hot tea will do fine. Hey, no one said it would taste good, it’s medicine!


Most Proud: Introducing RipeTrack

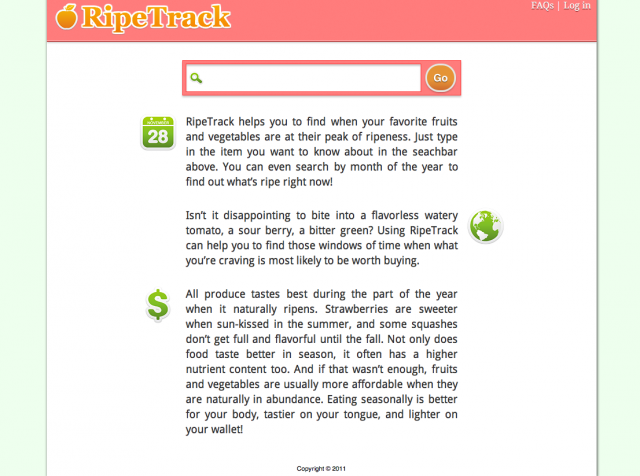
RipeTrack homepage

This here is my little baby….RipeTrack.

Jeff and I worked on creating this produce seasonality database for many long months before finally debuting it on the blog. It made me so happy to hear all of your congratulations and praise for our hard work. It’s still the post that I’ve received the most comments on and I’m so proud that it was this one.

We’ve been meaning to do some work on the site for a while but we’ve both been caught up with personal projects. Someday though, we hope to turn RipeTrack into the best source for seasonal eating on the web!


I’m supposed to tag 5 people to do this post on their own blog, but I’m already a little late in the game and I think that everyone I would tag has already been tagged. So, if you want to do the 7 links post and haven’t been tagged yet, consider yourself tagged!

Do you have a favorite post of mine? What’s your favorite post on your own blog?

post

Bar Exam: Odwalla Sweet & salty almond

I was a little nervous to buy this Odwalla bar because I’ve had one of their bars before that I was not a fan of. This one though was from their line of “chewy nut bars” that I hadn’t heard of, so I figured I could give Odwalla one more shot.

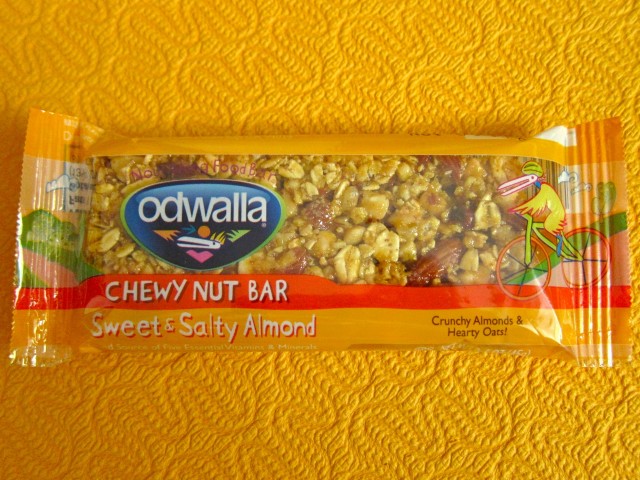
I will however, continue to be totally creeped out by Odwalla’s weird bird mascot. He looks like a soulless man-eating daggar-beaked pterodactyl sent straight from hell to poke my eyes out.  Seriously, look at how recklessly he rides that bike downhill with those face protrusions pointed straight toward certain calamity! Think of the children! 😉

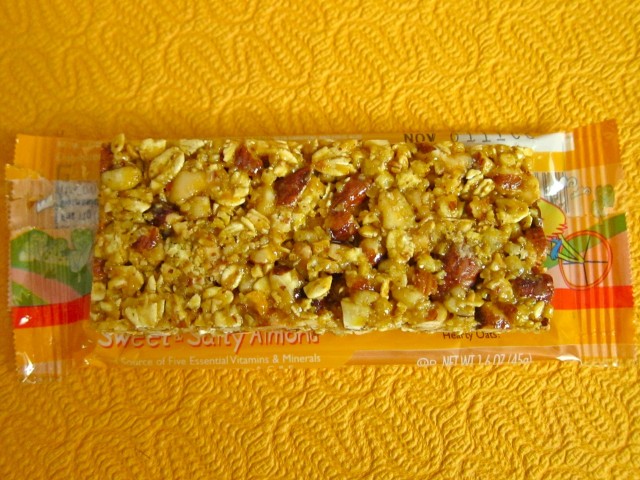
Odwalla sweet & salty almond bar

I couldn’t get a good shot of the ingredients or nutritional information because the font was white on an orange background, very hard to read.

It has 220 calories, perfect for a satisfying snack. Only 8 grams of sugar in this one which is fantastic. I’m pretty happy with the size of this bar too, it really fills up every inch of the packaging it comes in so you know exactly what you’re getting.

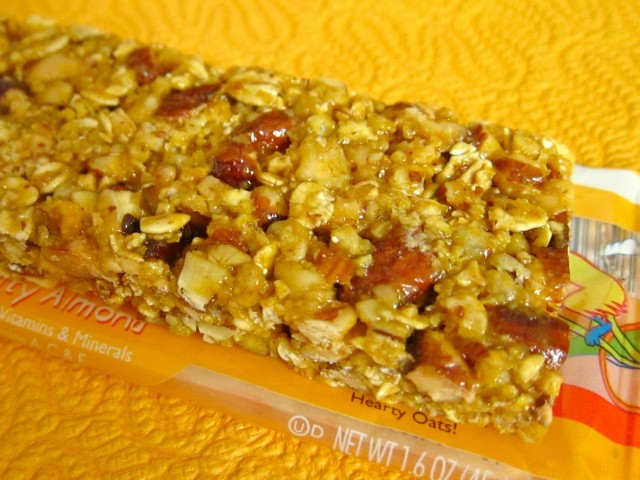
Odwalla sweet & salty almond unwrapped

Appearance: As you can see, there are tons of whole oats and large pieces of almond all glued together with a shiny golden lacquer.

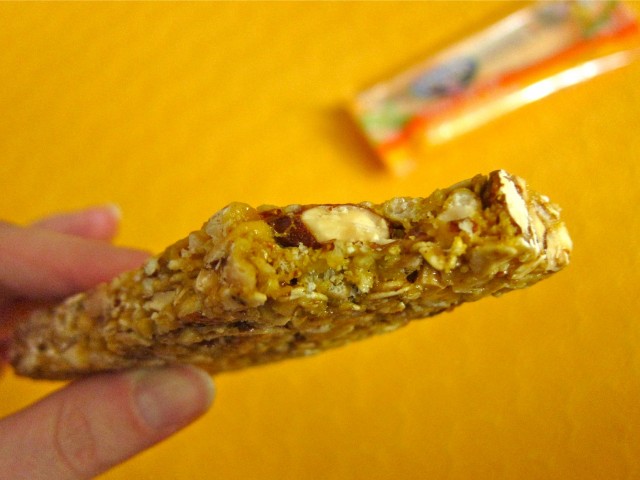
Odwalla sweet & salty almond side

Texture: You’d think it would be crunchy with the candy-like coating and huge almond pieces, but it is actually chewy as advertised. It’s flexible and bendy and not too sticky in your hand.

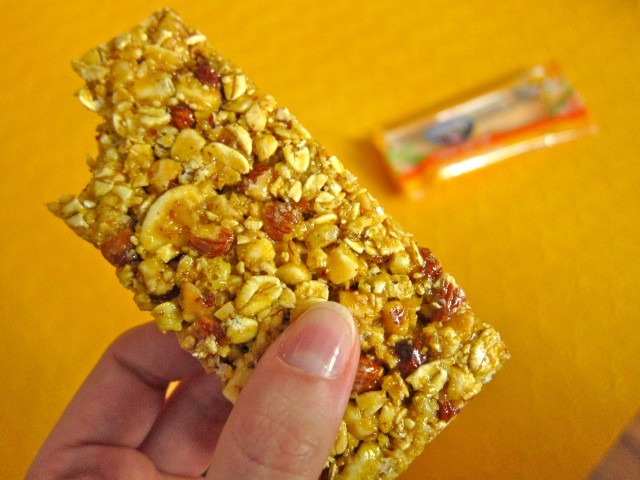
Odwalla sweet & salty almond bite

Taste: If I had to describe this flavor in one word I would choose “golden.” It has a buttery, honeyed, freshly baked sweet dinner roll kind of flavor. It reminds me a lot of caramel popcorn with it’s balance of sweet and salty. The almonds are roasted and flavorful and taste like those hot candied almonds you can buy at fairs. Incredible.

Odwalla sweet & salty almond close-up

Overall, I am so impressed with this bar. It tastes pretty sinful for being full of such wholesome ingredients. This is one I’m sure I’ll buy again, especially since Odwalla bars are very affordable.

Do you prefer chewy or crunchy bars?

post

Pork potstickers

I mentioned the other night that I was planning to make pork potstickers soon. I used to make these all the time before Jeff an I were married, and as delicious as they were we got sick of them from just how often they appeared on the dinner table. So, this was actually my first time making them in over a year!

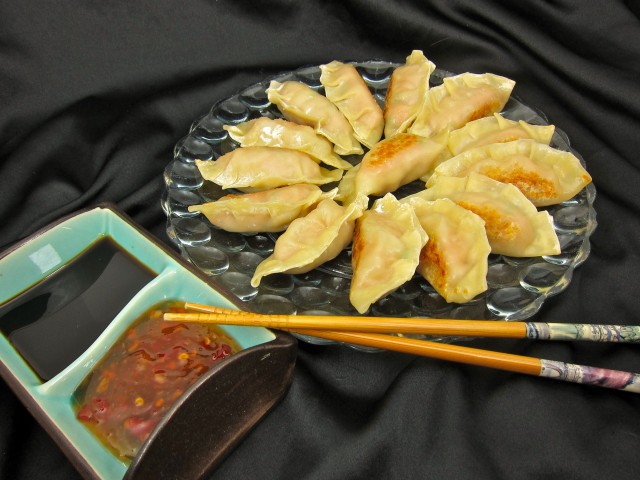
Cooked potstickers with dipping sauces

There’s a bit of a learning curve to making these, but they aren’t difficult by any means, just really different unless you’ve grown up making dumplings all of your life.

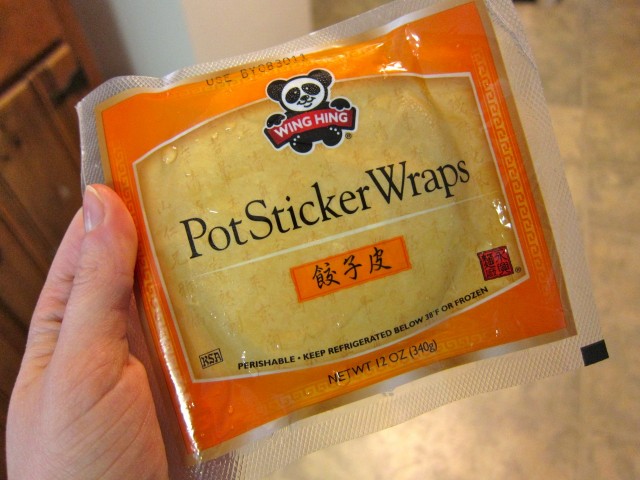
You can buy these round potsticker wrappers in the freezer section of most major grocery stores these days. If all you can find are the square wonton wrappers then those would be fine too.

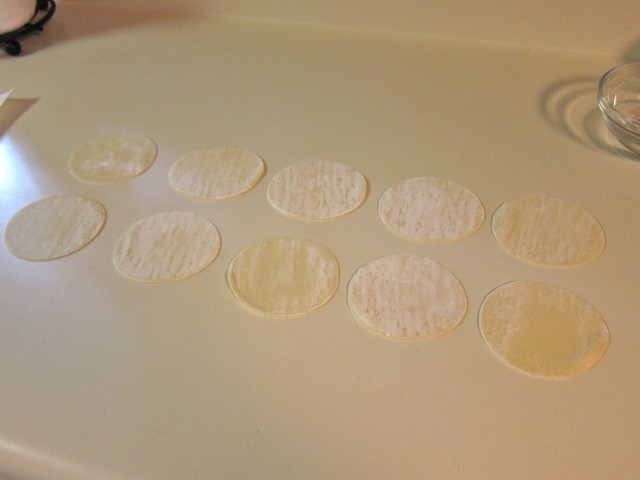
Potsticker wraps

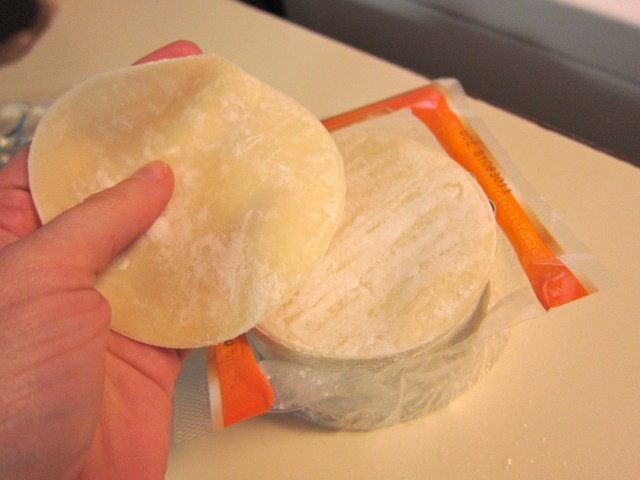
Keep them in the freezer until about 20 minutes before you’re ready to use them. I just set mine out on the counter while I prepped everything else. When you open them they should still be cold but they should also be pliable and come apart from each other easily.

Soft just out of the freezer

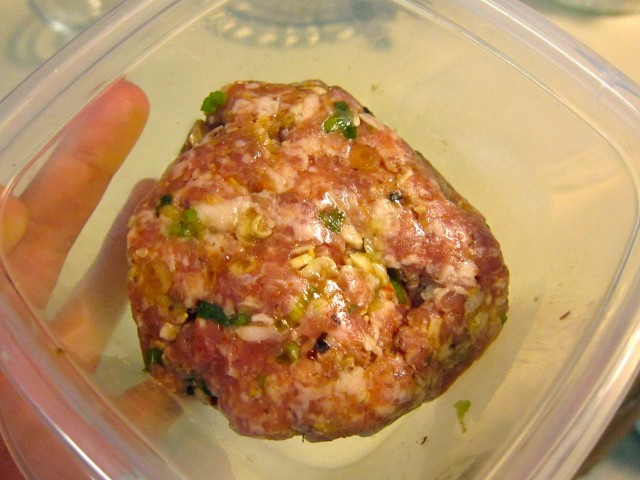
I had just under a half pound of the ground pork mixture that I used for the sweet and sour pork meatballs the other day. The recipe I’ve written out below is for a full half pound so you can recreate what I did more easily.

I have tried making this mixture ahead of time before and keeping it in the freezer but it doesn’t defrost very well, so I would plan on making the pork mix either right before you make potstickers or the day before and keep it in the refrigerator wrapped in plastic, but no longer.

Leftover seasoned pork

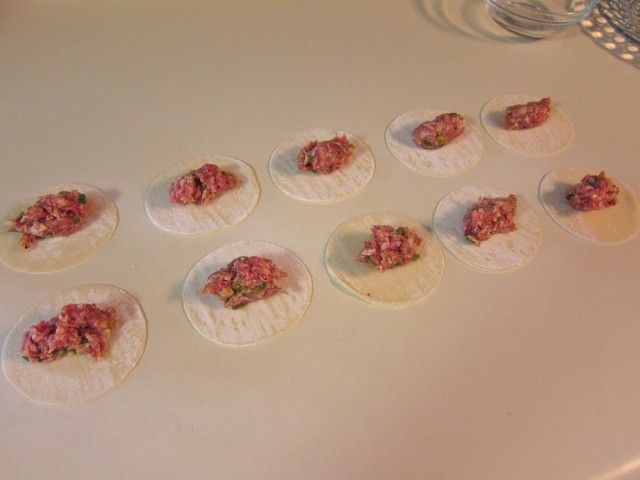
Lay out a bunch of wrappers on a clean surface. Also have ready a plate to put the finished potstickers on and a small bowl of water (I’ll show you what that’s for in a minute,) and several napkins cuz you’re gonna get pork all over your fingers. 😉

Laying out potsticker wraps

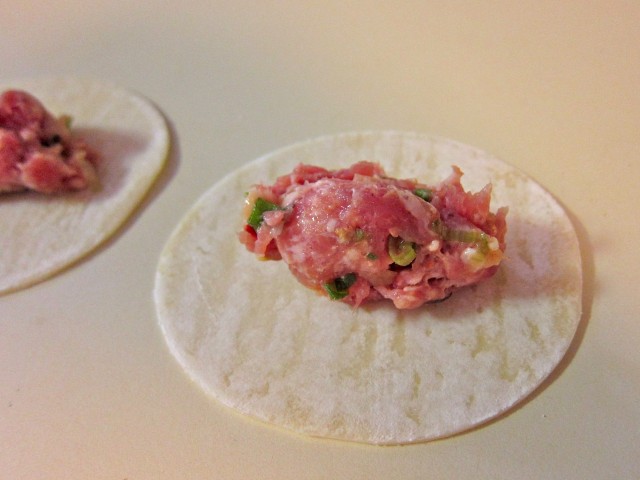
Place a small scoop of pork in the center of each of the wrappers. I would say that this is no more than 3/4 of a teaspoon. Don’t try to load it up any more or you won’t be able to close the potsticker and it may burst when the pork expands as it cooks. I’ve found that using the side of a spoon to scoop the pork into a small football shape works best.

Potsticker pork close up
Pork in potsticker wraps

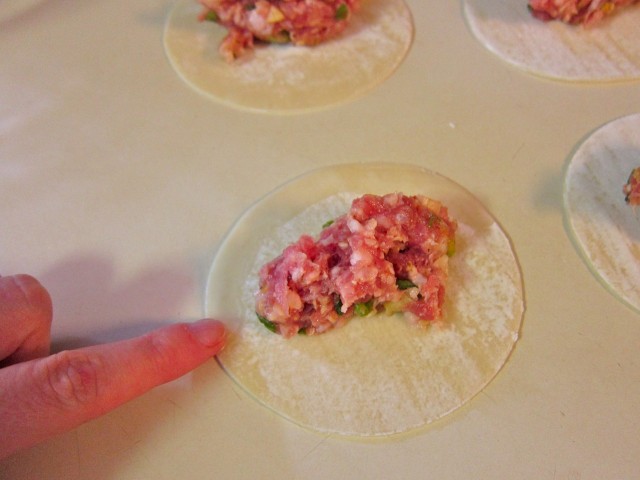
Here’s where that bowl of water comes in. Dip your finger in the water and run it along half the edge of the potsticker. The wraps are covered in cornstarch and they become sticky when wet. This is what’s gonna help to seal them up properly.

Wet half the edge

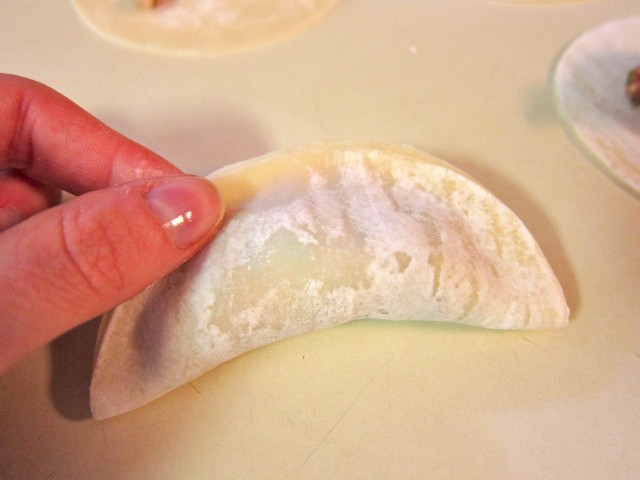
Fold the dry edge up to meet the wet edge and lightly press out any air, just like making ravioli.

Fold potsticker in half

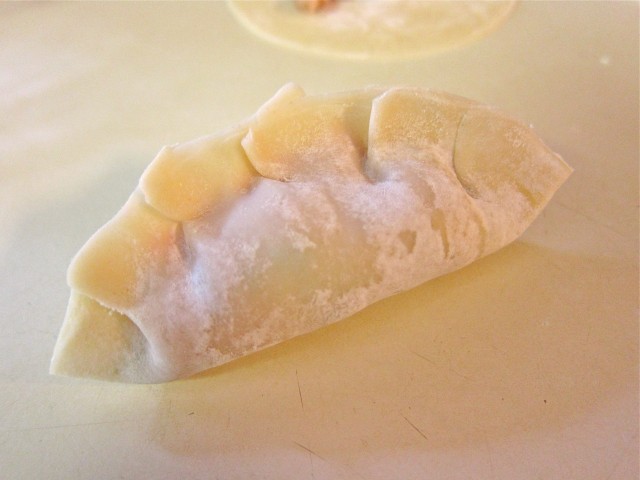
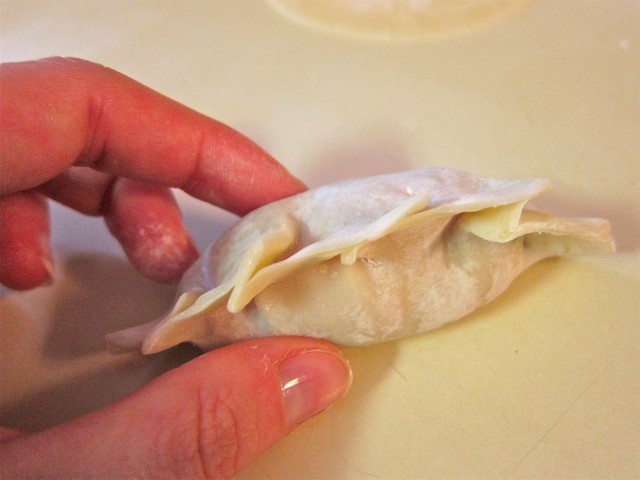
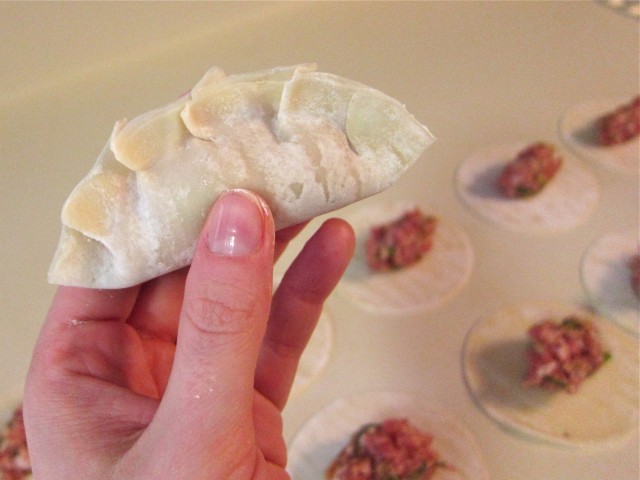
Here’s the fun part and I promise it’s not as difficult as it seems. Starting at one side, fold over a small pleat in the wrapper edge and press it firmly to secure. Do this again and again all the way across until you’ve created this little fan shape and then press again all over the edges just to be sure they’re closed. I’ve found that exactly 5 pleats works the best for me, but don’t think that you’ve done it wrong if you have more than that or fewer. It really only takes a few tries to get the hang of it and start cranking these out.

Crimp and press potsticker
Potsticker pleats
Finished potsticker

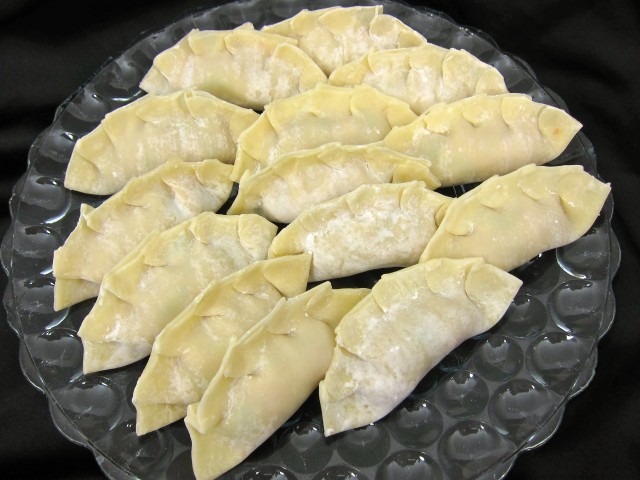
I made this plate of 14 in under 10 minutes, so it really isn’t a lengthly ordeal.

Plate of uncooked potstickers

These little guys should be cooked the same day. I’ve tried freezing some before and they just defrosted soggy and misshapen. I wouldn’t let them sit in the fridge too long either or the same could happen. There are liquids in the pork after all that can dampen the wrappers.

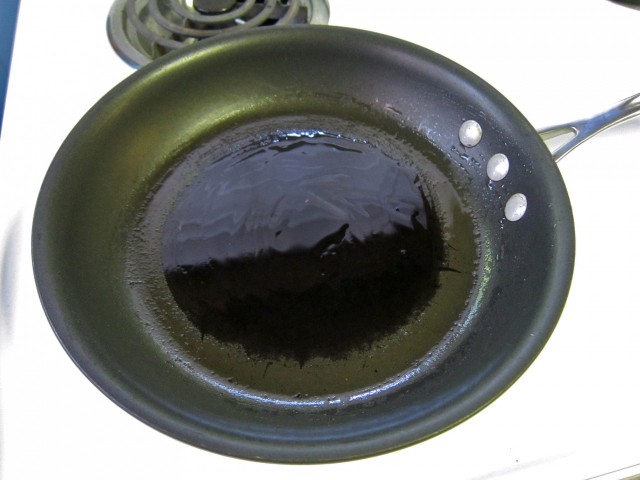
To cook, generously oil a pan that is not non-stick. These are “potstickers”, they are supposed to stick to the cooking surface. I’ve done it in a non-stick pan before and it’ll work but it’s not traditional.

Anyway, use an oil like sesame or peanut or even grapeseed, just not olive because it won’t taste right with the asian flavors. I used a paper towel to spread it evenly around the pan. Set the pan to medium heat.

Oil pan evenly

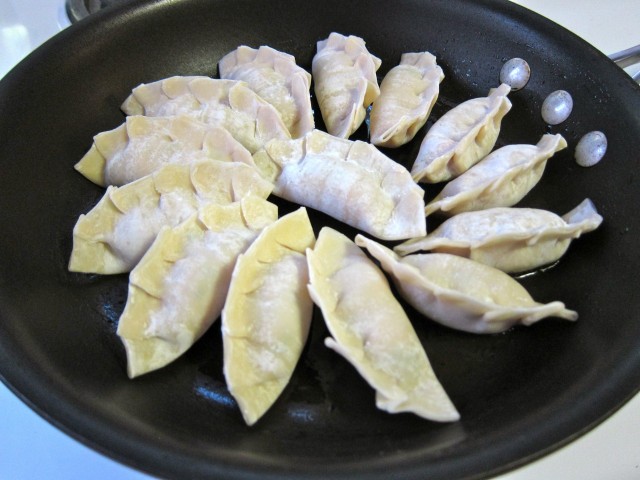
When the pan is hot, arrange the potstickers however they’ll fit.

Place potstickers in hot pan

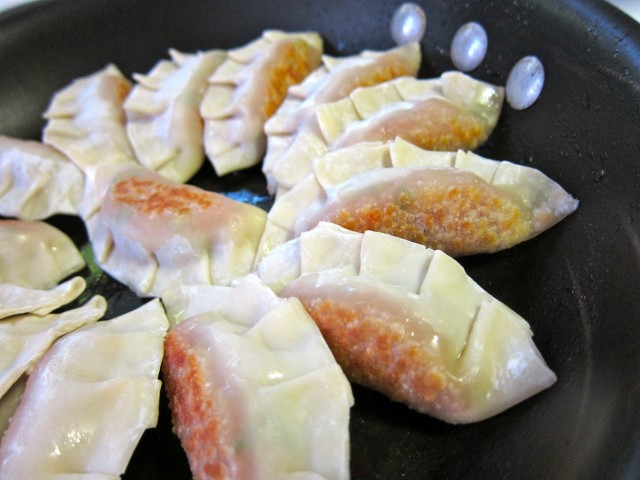
Traditionally, you let them brown only on one side, but I like more crunchy stuff so I flip them before they start sticking and let them brown on the other side too.

Potstickers brown on one side

Once they’ve stuck to the bottom, pour in a couple tablespoons of water and cover with a lid. You’ll hear them steaming away in there. Take off the lid after about 20 seconds, just before all the water has steamed away, and take out your potstickers. The water not only helps to release their grip on the pan but it also changes the texture of the wrapper to a chewier consistency.

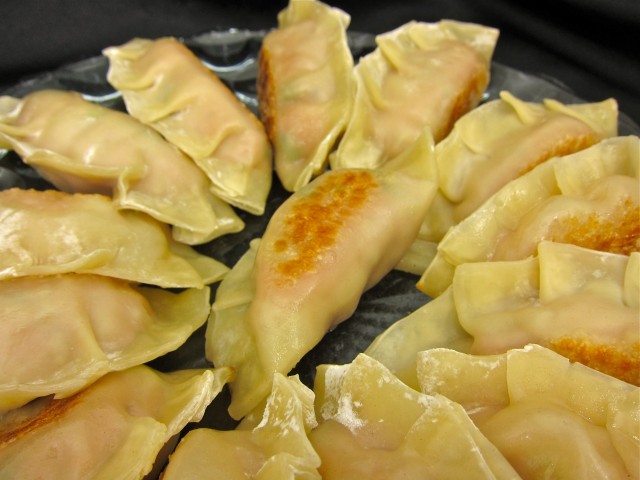
You can see here that they’ve taken on a golden color all over and are more translucent.

Cooked potstickers

Pork potstickers

Homemade pork potstickers aren't as difficult as they seem. A small labor produces a delicious result.

Prep Time: 20 minutes

Cook Time: 10 minutes

Total Time: 30 minutes

Yield: around 20 potstickers

Ingredients

  • 1/2 pound ground pork
  • 2 chopped scallions
  • 2 cloves of garlic (minced)
  • a 1 inch piece of ginger (grated)
  • 1/8 tsp. chili garlic sauce
  • 1 tsp. sesame seeds
  • 1/2 tsp. soy sauce
  • 1 tsp. mirin
  • frozen potsticker wraps
  • peanut or sesame oil for frying

Cooking Directions

  1. Take potsticker wraps out of freezer and allow to sit out until pliable.
  2. Mix seasonings into ground pork and scoop approx. 3/4 tsp. onto each wrap.
  3. Lightly wet half the wrapper edge with your finger and fold over into a half circle, smooth any air out.
  4. Starting at one edge, fold a pleat and press to seal. Continue pleating to other edge.
  5. Heat oil in a pan that is not non-stick and arrange potstickers. Flip when one side is browned.
  6. Pour approx. 2 tbsp. water into hot pan and cover with lid to let steam. Remove potstickers when water is evaporated.
  7. Serve with sweet chili sauce or soy.

I like to serve these with 2 dipping sauces – a sweet chili sauce and some soy sauce with a touch of mirin. They are very filling and really do make a meal on their own, but a fresh gingery salad would cut through the richness of the pork really well if you wanted something to go with them. I usually can’t eat more than 8 before I’m completely stuffed. :)

I know it’s so easy to buy a pack of frozen potstickers from the grocery and just heat them up, but this recipe really does come together very quickly and is pretty cheap too. Once you get the hang of the potsticker fan pleat you’ll be churning them out quickly and eating them even faster!

Are there any foods that you prefer to make from scratch that are readily available pre-made?