Skip to Content

category

Category: Discussion

post

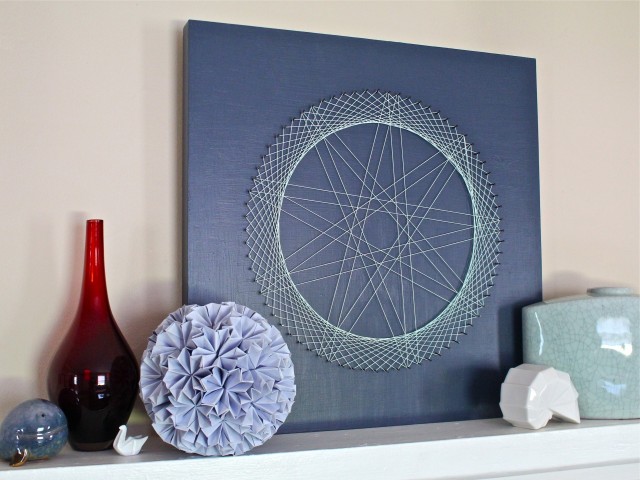
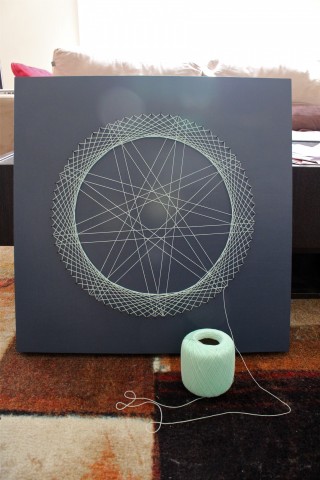
The finished string art piece

Tada!

The finished string art piece

In case you missed it…

Step 1: Building the wood canvas
Step 2: Priming and painting

The next step was to draw up a template as a guide for where to hammer in the nails. Like magic, I opened up my giant drawing pad I’ve had since high school and found a pre-drawn circle in it that was almost big enough. If you don’t have a magic drawing pad full of pre-drawn circles or an enormous compass just lying around, you can try any of these methods to draw a circle.

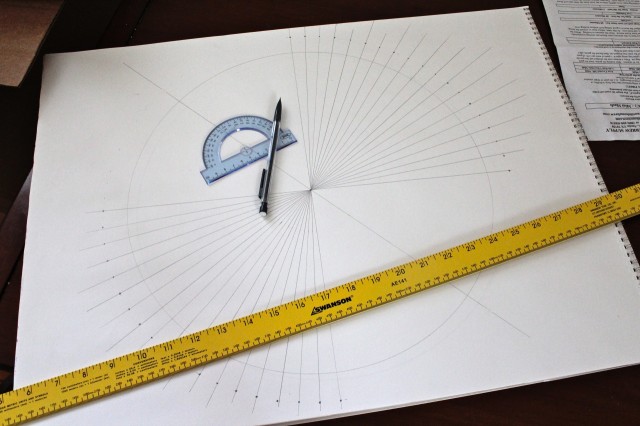
Remember your trusty old protractor from high school math class? He misses you. Find the center point of the circle and draw a line through the diameter in any direction. Line up your happy little protractor and make a small mark every 10 degrees all the way around, then flip it over and do it again. Remove the protractor and use a long ruler to draw more diameter lines that line up 10 degree marks on opposite sides with the center point.

making the template

I extended the lines past the circle edge because I decided that I wanted it bigger, so I just measured an extra inch outside the edge to place each of my dots.

Pop Quiz! If you’ve placed dots every 10 degrees on a circle, how many dots do you have? If you said 36 because there are 360 degrees in a circle — congratulations, you really were awake in class! You can do more or fewer dots if you prefer, just make sure there’s an even number of them.

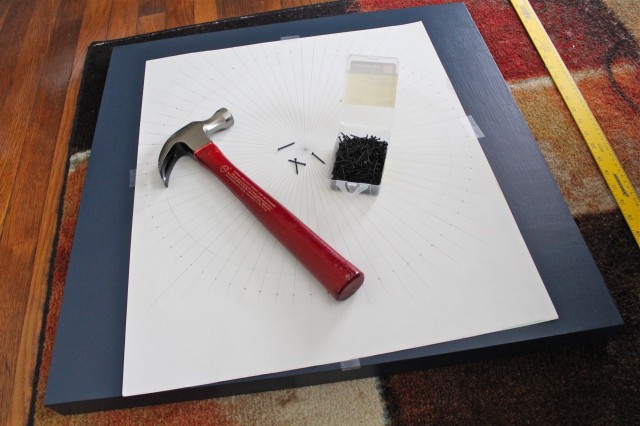
Ok, time to center the template on the canvas. Use your ruler to find the center of the canvas and line it up with the center point of the template. Tape it down with any tape that will peel up easily without leaving adhesive behind (Hint: Don’t use duct tape. Why would you do that?)

hammering pilot holes

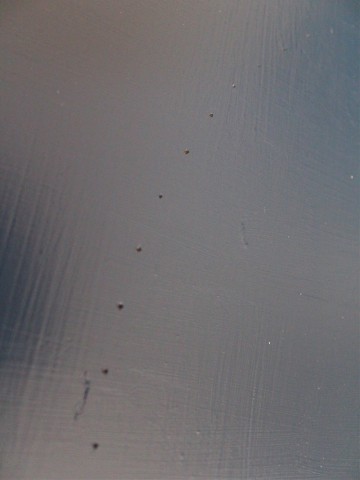
Take a nail, and start tapping in pilot holes all the way around. You’re not trying to hammer the nail all the way in, just enough to leave marks for later.

pilot holes in canvas

Ok, now here’s where I made things harder for myself than they had to be. I’m gonna show you what I did first and then tell you what would have worked better.

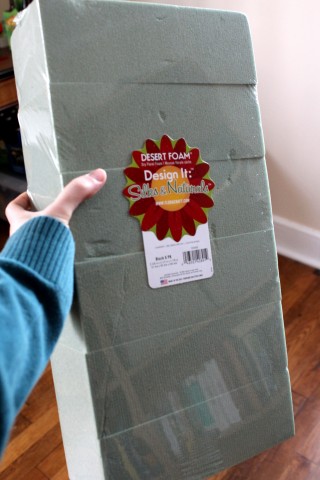
I was worried that because the face of the canvas was so thin, that the nails might not stand up straight in the finished product when they had string on them tugging in different directions. I ordered some florist’s foam off Amazon to adhere to the back of the canvas so that the nails would have something deeper to hold on to.

floral foam

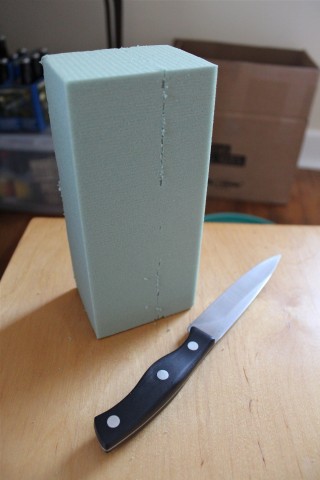
I made sure to cut it thinner than the canvas is deep. Wear safety glasses and even a face mask for this if you have one. This stuff shreds and gets crunchy green dust everywhere.

cutting floral foam to size

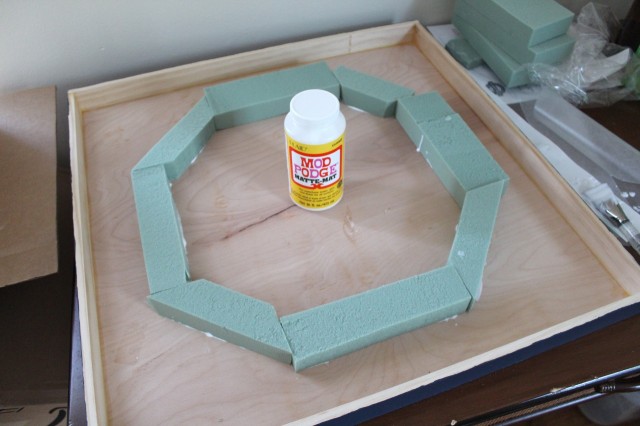
I then used the template to mark off where the circle was on the front by using a pencil to mark through all the little holes I made in it with the nail earlier. Then I glued down pieces of foam making sure to cover every dot and let it dry.

floral foam padding for the nails to grip

And that is where I went wrong. The glue on the back of the canvas made it really hard to drive the nails in. It would have been much better if I had just driven all the nails in first and then just stuck the foam onto the nail ends in the back. It would have held just as well and been a lot easier. Oh well.

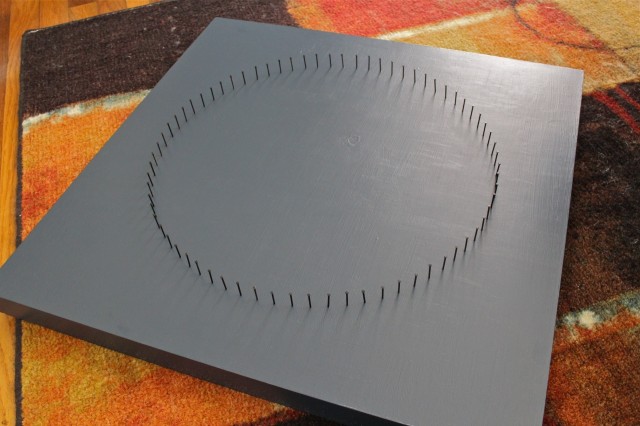
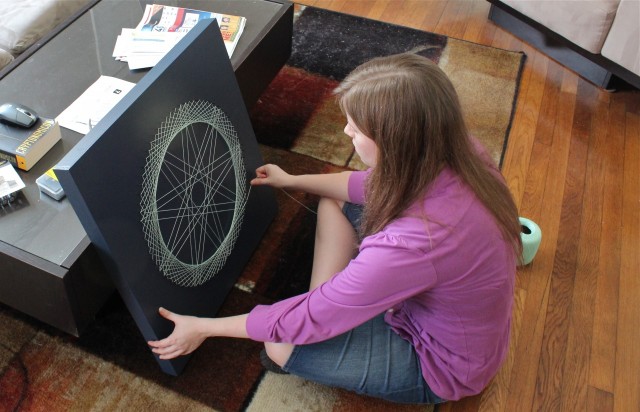
Ok so, back to what I actually did. I started by just hammering the nails in enough to get them all in, then I went back around and hammered them all down to the height that I wanted. I did this on a rug so that the canvas wouldn’t damage the floor.

Nails hammered into the canvas

And now we make art! I tied the crochet thread to a nail at the bottom and started by making the big star-like pattern you see in the background. To do this, I looped it around every 33rd nail working clockwise until it came back to the start. You won’t have to count anymore once you get it going and can see the pattern more fully.

Just finishing the string design

I immediately started the next later by looping every 18th nail, still working in the same direction until it came back to the start. At that point, I was pretty happy with the look of it, so I tied it off.

Finished design

The last step was to trim the ends off and seal them with a little dot of clear-drying glue.

And there you have it! You can add more layers if you want a fuller look or even use several different colors of thread. I may end up putting one more layer on this one sometime in the future, but I’m pretty happy with it for now.

The finished string art piece

Can’t wait to start the next project!

post

Tour Decatur 5k, 2012

This race did not go so well for me. Let me start at the beginning…

Friday night, I got no sleep. I have no idea why. We just got a brand new mattress that I’ve been sleeping very well on otherwise, so I’m not sure why I kept waking up every hour throughout the night. I got up with no problems though, and didn’t really feel tired.

I ate a bagel with goat cheese, which is normally my favorite for pre-workout fuel, but I had a really hard time choking it down and didn’t even finish it. I did manage to gulp down about 8 oz. of water though.

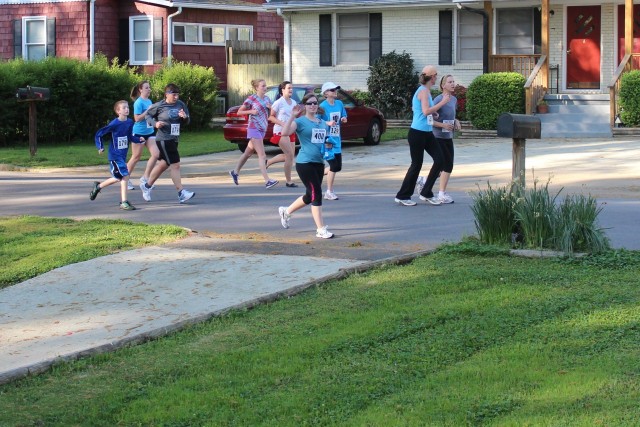
The race started at Decatur High School, which is actually walking distance from my house, so I walked over there about 15 minutes before start time while Jeff finished getting ready so he could take pictures as I passed (the course went through our neighborhood.)

As the race started at about 9:15, I felt totally fine. I knew that I hadn’t really trained for this race because I’ve been busy doing the LiveFit training program which restricts cardio in the first month, but it was a beautiful day and I was feeling good and trusted in my overall fitness level to get me through the 3.1 miles even if I didn’t set any records.

I wasn’t even half a mile into the race before I started feeling tired though. My legs were heavy and achey, my head was pounding, and my neck was tight. I was huffing and puffing and really having to push myself to keep moving, even while only doing around a 12 minute mile pace.

About half way through 5k

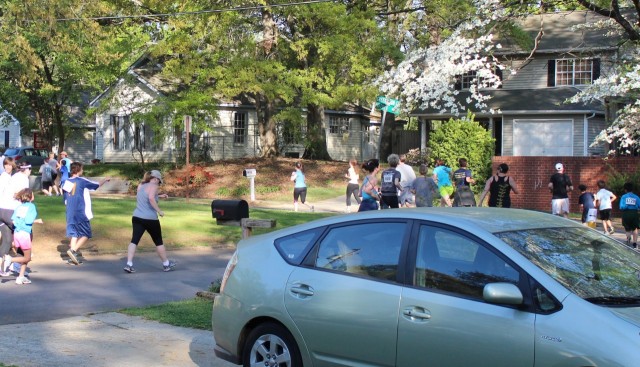
As I passed Jeff around 1.2 miles in, I let myself stop for a minute and confessed to him that I was really struggling. I ran around the corner but was walking again by the time I was out of sight.

Turning the corner

As I continued on, Jeff started walking down to the high school to meet me at the finish line. Really, I was hurting so badly and breathing so hard that if I didn’t know that he was at the finish line waiting for me I would have just cut back through the neighborhood and headed home.

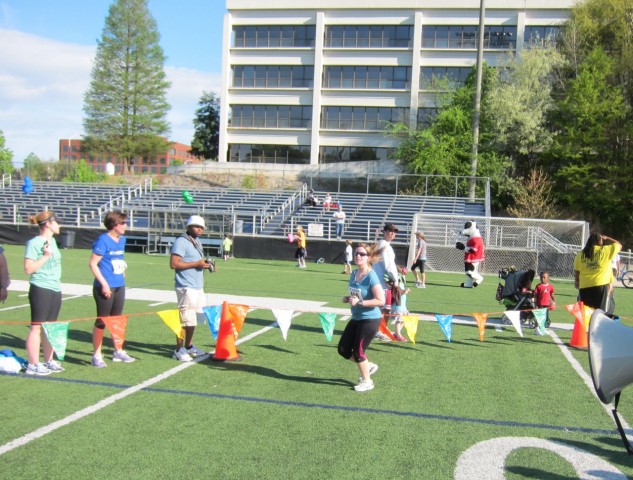
I tried hard to run as much as I could for the rest of the way, but it wasn’t a mental game anymore, I had a physical need to walk instead of run. I saved up my energy, and ran the last little bit onto the football field and through the finish line.

Coming into the finish

39:32, my slowest 5k yet.

I’d say that it’s just a product of not having really trained for this race, or that I didn’t sleep enough or ate breakfast too close to the start time, but I know there’s something else going on here. I seriously felt like a might have an aneurism around mile 2, and that makes absolutely no sense for someone who has a very healthy diet and exercises regularly. It also makes absolutely no sense to me that I’ve been trying my hardest to be a runner for nearly 3 years and I still to this day cannot run an entire mile without stopping. I mean, I could, but it’d leave me too exhausted to go any farther than that.

And then something clicked when I was talking with Jeff about this the other day. I just had blood work done recently so he asked me if my iron levels had come out as low because it sounded like I might be anemic. This was odd because I’ve been tested for anemia many times throughout my life because I’ve always shown the classic signs of iron deficiency, the most notable being persistent fatigue, but my iron levels have always been normal. I have; however, had extremely low levels of B12 for at least the last few years which has no dietary explanation. As it turns out, a serious B12 deficiency can manifest in much the same way as iron anemia, with chronic fatigue and difficulty breathing.

So, I’m writing all this because I intend to pursue some options with my doctor to get my B12 levels back into a normal range, and see if that has any affect on my running abilities and my overall energy levels. I want to share a bit of this journey here on the blog because I’m sure I’m not the only person out there who really struggles with exercise endurance, and if low B12 turns out to be the magic answer for me, then maybe that information can help someone else too.

This may have been my slowest race yet, but I’m actually extremely proud of myself because I truly had to fight to finish it. I’m hoping that if I can figure out what’s going on with this intense fatigue, it’ll be the last one that beats me.


post

Painting the canvas

I’ve gotten a bit farther on my art project, the first part of which can be found here.

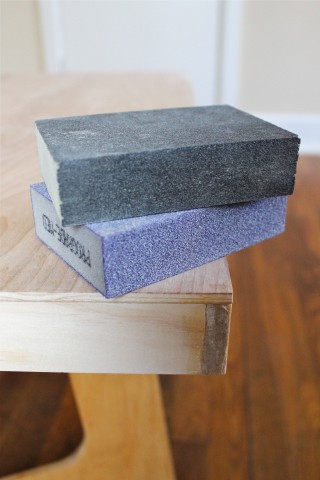
Now that the canvas had been assembled and the wood glue paste had dried, it could be sanded smooth. I started with a medium grain sanding block to file down the bulk of the imperfections. I used a circular motion while applying pressure, being careful not to rub too hard on the edges which could cause them to splinter. Once all the bumps were smoothed out, I went over it again with a fine grit sanding block to remove any rugged texture caused by the first sanding.

two grits of sandpaper block

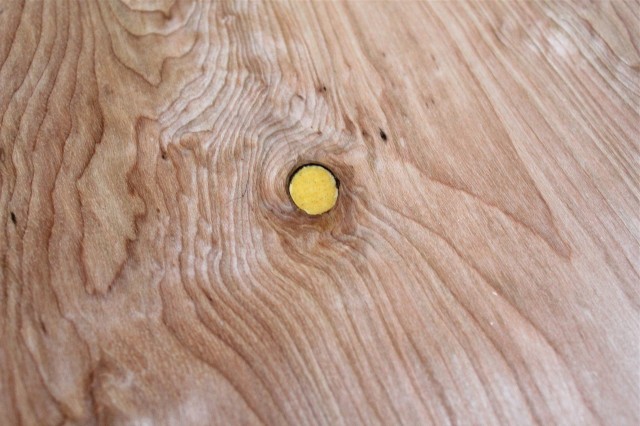
I also needed to fill in two knots on the face with a bit more wood glue to make an even surface.

knot filled with wood glue

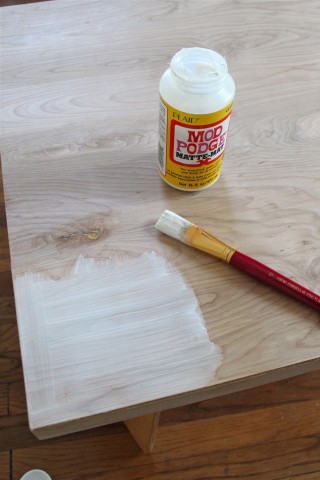
Once that was dry, it was time to prime! Just like when painting a wall, a good prime coat can help to seal the surface so that the top coat of color doesn’t just get soaked up like a sponge leaving splotches of uneven color. I could have used a white paint or even one a shade lighter than my top coat to prime with, but I chose to use Mod Podge, a very clear-drying glue-like substance that I had on hand.

Painting on Mod Podge

I used a brush because that’s what I had, but I would highly recommend you use a foam brush or small foam roller if you can find one, as they don’t cause the same streakiness and texture that a bristle brush can cause. Ideally, spray paint would have been even better for both primer and topcoat as it would completely eliminate texture, but I couldn’t find a color that I liked. I just used extra care in painting the primer on as smoothly as I could while still working quickly, because if you try to paint over an area that is partially dry you’ll end up creating even more undesirable texture on the surface.

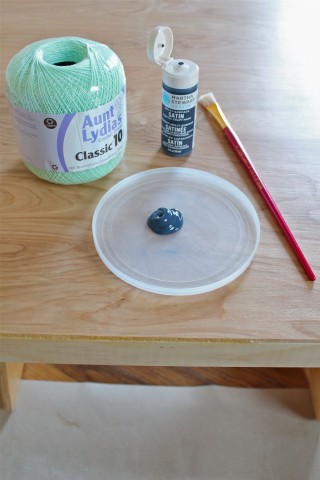
When the primer was dry, I was ready for the top coat. I used this Martha Stewart acrylic craft paint in “deep sea” with a satin finish. Next to it is the contrasting mint-colored crochet thread I’ll be using to make the string art with later!

acrylic paint and crochet thread

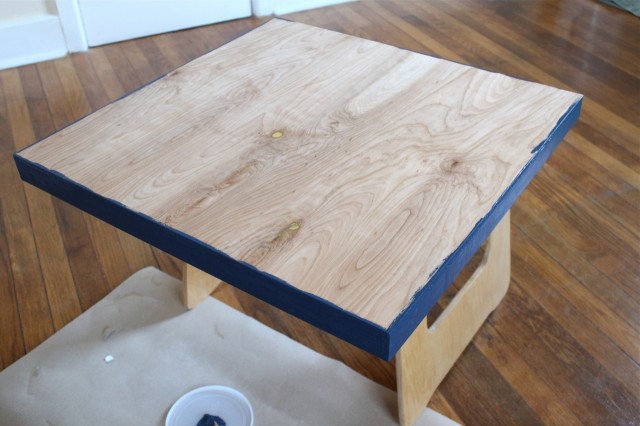
I painted the sides first…

sides painted

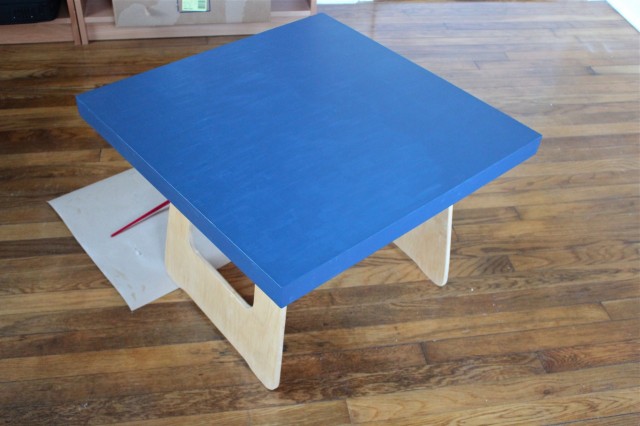
And finished the top making sure that all of my brush strokes were in the same direction. This canvas got one more coat with all brushstrokes in the opposite direction, again to minimize the unavoidable surface texture created when using a bristle brush.

first coat of paint finished

That bottle of craft paint ended up being exactly enough to cover the canvas twice. Lucky!

Now, I’m waiting for something to come in the mail before I can work on this project any more. You’ll see what that is on the next project update!