Skip to Content

category

Category: Discussion

post

Brew #2

Nope, no Valentine’s Day post. Jeff and I just sat on the couch and watched How I Met Your Mother over a plate of freshly baked chocolate chip cookies. Neither of us really care about Valentine’s Day. And after having worked in restaurants for nearly a decade, I always feel a terrible anxiety in restaurants on holidays because I get this constant terrible feeling that I need to quit goofing off and get back to work. Makes it difficult to enjoy myself.

We did do fun stuff over the weekend though. Sunday was our second ever brew day, and this time Jeff invited a bunch of folks over to have beer and chit chat with us while we all stood around and watched water boil. I can now say with certainty that a watched pot will indeed boil. 😉

He prepped all the equipment while I cleaned up the house.

Jeff prepping for brew guests

And he wrote out all of our brew plans on a white board so everyone could follow along with what we were doing.

Brew day instructions

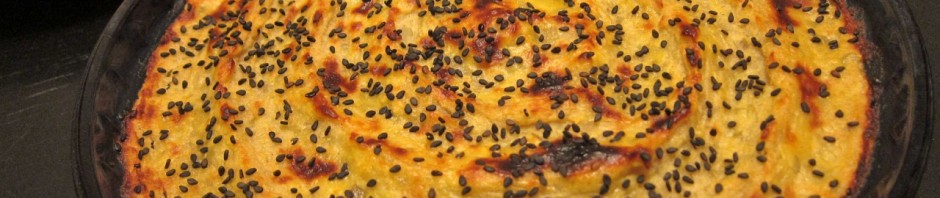
I made some snacks, a roasted garlic and chickpea dip with veggies and a persimmon yogurt dip with cinnamon chips.

Roasted garlic dip and persimmon yogurt dip

Our friends, Kelly and Marshall, brought some homemade vegan samoa bars too that were so yummy! The snacks disappeared fast!

Brew food plus samoa bars

This brew was much shorter than last time, about 3-ish hours rather than 8, because we were doing a mini mash. Basically we were brewing a smaller quantity of liquid, but super concentrating it with flavor and then diluting with water later.

Steeping the grain in a mini mash

I really liked having friends over for brew day. It was fun to stand around and talk over the bready smell of infusing grain, and having a few extra sets of hands helped too.

Brew day chatter

And not to mention the beer drinking!

Getting our beer on

Really, any excuse to get friends together to drink beer is a good one. I think we’ll be doing this brew day party again, and maybe expanding it next time. I know it’ll be more fun in the spring when we get a propane burner and can take this party outside to brew (and drink) in the sunshine.

And wouldn’t you know, the beer from our first batch is finally ready for consumption and we should be popping the first bottle open sometime this weekend! I see myself having a lot of dinner parties in the upcoming months for the sole purpose of having people over to help us drink all this beer. I’ll be sure do do a full review of our first brew when we crack it open!

post

Bottling our beer

I mentioned in passing that this past weekend Jeff and I finally got to bottle the beer we made several weeks ago. You know I documented the whole thing!

We started by siphoning the beer into another bucket to separate it from any crud such as dead yeast film or hop sludge. Sounds delicious, right?

Siphoning beer

Jeff read online that it can be helpful to fill the bottles over the dishwasher to catch any drips or spills. We immediately saw the wisdom in this when we proceded to spray it all over the place.

Filling over the dishwasher

We had been collecting used beer bottles for the past 6 weeks to use for bottling and I think we were able to acquire around 75. Don’t worry, we didn’t drink all of that ourselves, many were donated from friends who knew we would need them.

They got soaked in OxyClean to remove the labels, were sanitized, and then covered with some foil to keep the dust out.

Our collection of scavenged bottles

After each bottle is filled, you clamp on a cap with this scary capping device. I let Jeff do this since it requires some muscle.

Jeff capping the beer bottles

Our first 6 pack!

Our first 6'er

We ended up with 47 bottles total. Way more than we will be able to drink by ourselves, especially because we’re starting another batch this Saturday! Not only that, but we’re brewing another batch in a month. Jeff is definitely addicted and I think this is going to turn into a monthly thing for us.

More beer than we can drink alone

There is no way we’ll ever be able to drink as much beer as we want to make, so I’m sure we’ll be pawning it off on anyone that enters our home.

The beer we’re making this weekend is a replica of one of my very favorite beers ever, the Rogue Hazelnut Brown Nectar. I tried it for the first time in Seattle when I was still getting over some stomach poisoning. I was feeling terrible at dinner and couldn’t finish my food, but I could not let myself stop drinking that beer because it was the most delicious beer I had ever tasted. I won’t be sad to have a huge stash of it at home!

What is your favorite beer? Or, what is your favorite “special” beverage that you just can’t get enough of?

post

Japanese sweet potato casserole

So, I may have promised to share my recipe for the Japanese sweet potato casserole I brought to the blogger potluck over the weekend. It was intended as a recipe for my cookbook and it will still appear in the finished version, but I suppose I could give this one away early as kind of a teaser. 😉

It really couldn’t be simpler, but yields an impressive result. If you can make mashed potatoes, you can definitely put together this delicious Japanese take on the traditional Thanksgiving classic.

My Japanese sweet potato casserole for potluck

Japanese sweet potato casserole

A Japanese interpretation of the classic Thanksgiving side dish featuring the subtle sweetness of Japanese sweet potatoes.

Prep Time: 25 minutes

Cook Time: 20 minutes

Total Time: 45 minutes

Ingredients

  • 2 very large Japanese sweet potatoes
  • 4 tbsp. butter
  • 1/4 cup sugar
  • 1/4 cup milk
  • 1 tsp. cinnamon
  • 2 egg yolks
  • sesame seeds for garnish

Cooking Directions

  1. Peel potatoes and chop into small pieces of roughly the same size.
  2. Boil potatoes until tender (approximately 15 to 20 minutes.) Drain and pour into a large mixing bowl.
  3. Mash with butter, sugar, cinnamon, and milk while still warm. Allow to cool, then mix in one of the egg yolks.
  4. Pour into a 9 inch round or square baking dish and use the back of a spoon to make a design of your choosing on the surface.
  5. Break apart the remaining egg yolk with a fork and brush the entire yolk over the surface of the casserole being careful not to flatten the design. Sprinkle on sesame seeds if desired.
  6. Bake for 10 minutes at 350 degrees to heat it through then put under the broiler for up to 10 minutes to brown the top.

This recipe was actually inspired by a type of Japanese candy known as a “wagashi.” Wagashi are small individual-sized desserts that are traditionally served with tea. Typical flavors include mashed chestnuts, green tea, several varieties of sweetened beans, dried fruits, steamed squashes, and also sweet potatoes.

One common wagashi is the suito poteto, which of course refers to the fact that it is made from sweet potatoes. The potatoes are steamed, mashed, lightly sweetened with sugar, formed into a ball, glazed with egg yolk, and then baked. I’ve used a similar process and ingredient list to make this Japanese sweet potato casserole reflect the suito poteto wagashi, but added cinnamon to tie it together with the Thanksgiving dish of sweet potato casserole.

Japanese sweet potato casserole

I’m starting to see Japanese sweet potatoes, also known as satsuma-imo, popping up in regular grocery stores everywhere. They have reddish purple skin and pale white flesh and come in varying shapes and sizes. They’re a bit starchier and harder to cut than regular sweet potatoes and are a little less sweet, but they can be used in any way that you would normally use a regular sweet potato. I’ve had success mashing them, roasting them, even making thick-cut fries. They’re not too bad baked whole and slathered in butter either. 😉

If you see them in your local grocery or market give them a try, whether you use my recipe for Japanese sweet potato casserole or one of your own!

Update! This recipe can be found in my cookbook, The Japanese Pantry, along with other fun Japanese fusion foods such as crispy “popcorn” edamame .