Skip to Content

tag

Tag Archives: jam

post

Strawberry champagne jam and 3 wonderful years

Last week, Jeff and I celebrated our 3 year wedding anniversary on May 1st. I said it last year around this time and I’ll say it again – it feels like we’ve been together much, much longer than that, but I mean that in the sweetest way possible. My memories of the time before “us” are hazy and dull. The happiness I’ve experienced since we met has been bewildering. I didn’t think this kind of love existed for ordinary people like us, and it just keeps growing and getting better and better.

Strawberry Champagne Jam

Enough with the mush.

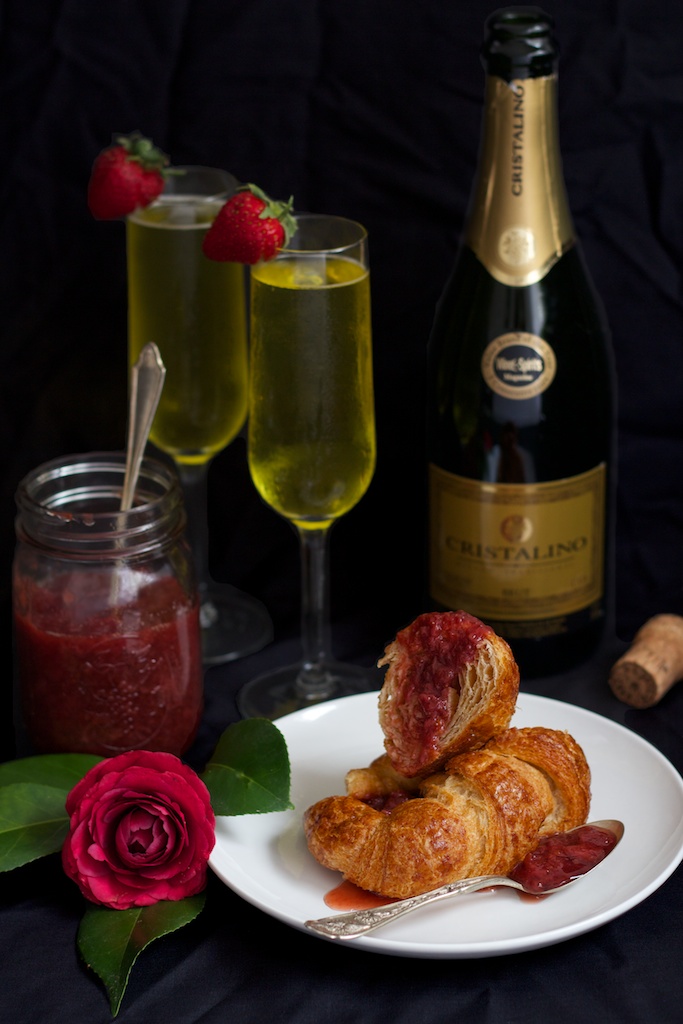
We’ve had 2 bottles of champagne left over from our wedding that have been taking up space in our fridge for 3 frickin’ years now, and though we would love to have the space back, we just can’t ever find a good enough reason to pop such a special bottle. If we’re splitting hairs, then I should mention that they’re actually cava, a Spanish wine made in the style of champagne (it’s not technically champagne unless it’s made in the Champagne region of France.) I’m not a wine person, so I have no problem erroneously referring to them as champagne. Tastes like champagne to me.

Strawberry Champagne Jam

I had the idea for this recipe a few weeks ago and asked Jeff over dinner one night if he would be comfortable with letting me use one of our special bottles to make it. I could just see him debating it heavily in his head, and it was actually several days before I was given the blessing to use it. I figured there would be a lot of it left that we could sample later that night and reminisce together over, but somehow I ended up using the whole dang bottle! Whoops.

Strawberry Champagne Jam

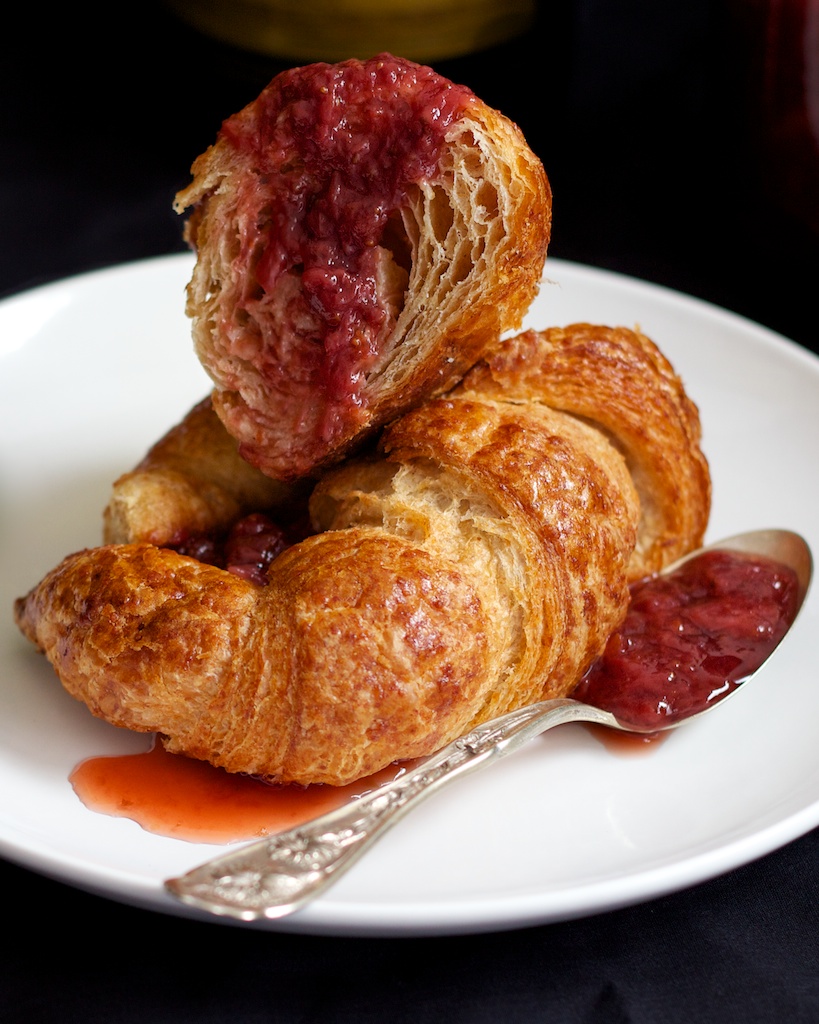
It turned out fantastic though. It’s not really boozy at all, but there’s a heavy white grape flavor with a bit of tingly something there, kind of like the enzyme-y tingle you get from honey. It’s a bit on the thin side too but I thought it was fine that way, good for dipping a croissant in. It would be absolutely incredible as a topping for vanilla bean ice cream or paired with some really nice cheese.

Strawberry champagne jam

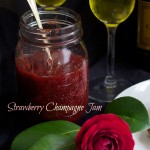
The classic marriage of strawberries and champagne in a luscious jam.

Prep Time: 10 minutes

Cook Time: 1 hour

Total Time: 1 hour

Ingredients

  • 6 cups strawberries (leaves removed and cut in half)
  • 1 cup white sugar
  • zest of 3 lemons
  • 2 tbsp. lemon juice
  • 1 750mL bottle of champagne (about 3 and 1/2 cups)

Cooking Directions

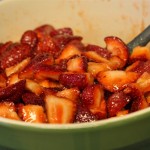
  1. In a large bowl, stir together strawberries, sugar, zest, and juice then allow to sit for 1 hour covered with a kitchen towel.
  2. Transfer contents to a large, heavy-bottomed stainless steel pot and pour over the champagne. Stir until foaming has stopped.
  3. Turn on the heat to just above medium and allow to come up to a low boil. Stir frequently with a spatula and reduce heat if you feel anything starting to stick to the bottom or it could burn.
  4. After 1 hour, test doneness by adding a small dime-sized dollop onto a frozen plate. Wait 20 seconds, then tilt the plate. If it runs freely, it needs more time; if it barely runs, it's done. Continue boiling jam until it passes the run test.
  5. Finished jam can be canned or the majority frozen while a small amount is kept in the refrigerator for immediate use.

Obviously, a jam recipe that uses an entire bottle of champagne is not made inexpensively. This is certainly not something you’re going to make on a whim unless you’re just rolling in cash. It would, however, make for a very thoughtful and personal anniversary gift to give to a special couple in your life. I know Jeff and I will get much more enjoyment out of this jam than we were getting from that bottle taking up room in our fridge that we never had the heart to open.

Strawberry Champagne Jam

Just don’t wait 3 years like we did.

Do you have a sentimental food item you can’t bring yourself to indulge in?


post

Crusting no-melt buttercream of my dreams and my favorite vanilla cake

If you’d like to follow along with the whole process: Check out how I made the strawberry jam filling, watch me work with fondant, add the finishing touches, and see the finished cake!

So that was the jam, but I also used Monday to whip up 6+ pounds of buttercream frosting. Sounds like a lot, but it’s actually really quick and easy to make, only I had to do it in 3 batches because it wouldn’t all fit in the mixer at one time.

6 lbs. of buttercream

For a 2 lb. batch of vanilla buttercream which can be multiplied easily…

Crusting No-Melt Vanilla Buttercream

Ingredients

  • 2 sticks (226 grams) room temperature unsalted butter
  • 12 oz. (340 grams) unflavored vegetable shortening
  • 1/2 tsp. salt
  • 2 tsp. vanilla extract
  • 2 tbsp. milk or cream
  • 2 lbs. (32oz., 907 grams) powdered confectioner's sugar

Cooking Directions

  1. Beat together butter and shortening until pale and glossy.
  2. Add salt and vanilla and mix in.
  3. Add in powdered sugar a little at a time on low speed, beating on a higher speed between each addition to fully incorporate.
  4. Add milk and mix on low, then beat on high until frosting is pale and fluffy.
  5. Store covered in the refrigerator and allow to come to room temperature again before using.

Now, I normally wouldn’t touch shortening with a ten foot pole for my baking projects, but it is absolutely invaluable for frosting cakes that may be exposed to hot, humid weather for long periods of time. This is; of course, a major concern in Georgia, and sure enough Caitlin’s cake ended up sitting out in the 80+ degree weather for a few hours before it was cut into. The fondant on the outside of the cake suffered a bit, but the buttercream inside refused to melt. Shortening may be unhealthy, greasy, and take away some of the rich butter flavor of an all-butter frosting; but while it may start to get glossy in the heat, it just won’t melt. And you know, the finished frosting tastes really good too, so I’m not going to complain.

Anyway, the next day I got to baking the cake layers so I’d have somewhere to put all that frosting and jam. For the next few days, I only got pictures of baking the biggest tier, and frosting the smallest tier; so though the pictures below happened on different days they’ll still give you the idea of the flow of things.

Dollops of batter in the baking pan

I used the same vanilla cake recipe as last time because it’s really simple to prepare, it makes a sturdy and durable cake, and it has a rich buttery flavor. It’s a little denser than a typical wedding cake, but I personally enjoy the texture. It just tastes and feels more homemade.

Here’s the recipe I use that will fill two 9-inch pans…

My Favorite Vanilla Cake

Ingredients

  • 2 sticks room temp. unsalted butter
  • 2 cups white sugar
  • 4 large room temp. eggs
  • 4 tsp. vanilla extract
  • 3 cups all-purpose flour
  • 3 and 1/2 tsp. baking powder
  • 1 cup room temp. milk

Cooking Directions

  1. Butter and flour two 9-inch baking pans and set aside.
  2. Cream together butter and sugar until pale and fluffy.
  3. Add vanilla, then eggs one at a time, mixing between each addition.
  4. Sift together flour and baking powder and add to batter in 3 additions, mixing between each.
  5. Slowly pour in milk while batter mixes on lowest speed, then beat on medium-high for several seconds to fully incorporate.
  6. Pour into baking pans and spread evenly with a spatula. Bang bottom of pans on a hard suface a few times to bring any air bubbles to the top of the batter.
  7. Bake in a pre-heated 350 degree oven for 40 minutes.
  8. Allow to cool in baking pans until pans cool enough to handle, then turn out onto cooling racks and allow to come to room temperature before use.

This recipe can also be halved, which comes in handy for the smaller tiers of cake which use one and a half batches to fill two 6-inch pans.

So after the cakes are completely cool, they get a haircut. The puffy muffin tops get sliced off and the brown crust is removed from the undersides of any layers that face the center of the cake.

Trimming the muffin top from the bottom layer

My favorite way to do this is to use a small pairing knife first to make an incision all the way around the cake, then I take a longer knife and sweep towards the middle from all sides until the muffin top slides right off. At this point you should break off a slice of muffin top and slather it with frosting so you can “test it for deliciousness.”

As you can see above, the bottom layer is on a round of cardboard for ease of moving it around and for added stability.

Slicing cake layers in half

For the smallest tier of cake, I was able to just bake two really tall layers and slice them each in half for 4 total. I wouldn’t try this trick with the bigger layers though, they’d be too heavy and flimsy and just break apart. It’s hard enough to move them around without breaking as it is.

Time to frost! I decided to get all fancy and purchase a cake decorating turntable this time around. Best $20 I could have spent. It made frosting so much easier and I’ll definitely still get use out of it for other baking projects throughout the year.

Layer 1 plus frosting

Layering with more frosting, a big dollop of jam, and piled high with yet more frosting to start the crumb coat…

Layer 2 plus jamFull top tier getting crumbcoated

The crumb coat is a thin layer of frosting that helps to seal in the moisture and crumbs. It keeps your cake fresh and spotless. You basically just glob on frosting all over, then use either an offset spatula or scraper tool to scrape it all back off. This is also when you want to pay attention to how your cake layers are lined up; once you put it into the fridge for the buttercream to crust up, there’s really no more moving them around.

Smoothed out crumb coat on top tier

After about about an hour in the fridge for the buttercream to crust (become slightly hard and crispy) I took it back out to frost. It’s the same technique as the crumb coat, only you apply less pressure when removing the excess frosting to leave more behind. At this stage you want to work to get the frosting as smooth as possible. Here mine is crusting up in the fridge. It’ll get one more polish with the scraper once it hardens to remove the last of the imperfections.

Top tier chillin' in the fridge

I also went ahead and made some bases for each layer to sit on out of some foam board from a shipping container and covered them in foil. Right now, this is the best solution I have for transporting my cakes undamaged. We have some plastic angled bracket things that velcro to the fabric material in the back of my car and we use those to corral the cake bases in place. They’re secured to the bases by a bit of double-sided tape. That makes it easy for me to pry them up, but hard for them to slide around.

My wedding cake setup

So that’s it for the frosting. Next time we talk about my mortal enemy – fondant. My eyes are rolling back in my head just thinking about it.

post

Strawberry jammin’

I am so excited to share with you my recent cake baking adventures! As you may know, I made my first wedding cake ever last year for Jeff’s younger brother. It was a long and difficult process and at the time I was sure I’d never want to do another one again. But, I learned so many things last time about how I could have done it better if I had it to do all over, so naturally I began to wish I had another chance to put this new-found knowledge to use.

The engagement of Jeff’s youngest brother; Bryan, to his lovely fiance; Caitlin, gave me just that chance. I offered to do their cake for them and was both excited and nervous when they accepted. Caitlin decided on a sophisticated and classic design that I was sure was in the realm of my abilities, but there was one component to it that I had absolutely no experience with… jam.

cutting strawberries for jam

Sure, I could have just bought jam, but I saw an opportunity to learn a new skill and create something really custom and unique. And so, this cake baking journey begins with $18 worth of strawberries and some seriously good strawberry vanilla jam.

I started the Monday before the wedding (which was on a Saturday.) It took about a half hour or so to chop up the 4 quarts of strawberries I needed for the recipe. I used about 3/4 of the giant flat of berries I purchased, leaving me with a huge gallon bag of them that’s now sitting in my freezer ready to become smoothies. :)

strawberry jam ingredients

I had to learn all about jam-making for this project, and one thing I learned was that a jam needs pectin (a complex sugar naturally occurring in plants that acts as a gelling agent) in order to set up correctly. Strawberries are very low in pectin naturally, so you need to add some to get the right consistency. You can buy pectin in powder form, but for the life of me I couldn’t find the stuff anywhere, so I went with another technique to introduce pectin to the jam: citrus zest.

Citrus fruits; especially their rinds, pith, stems, and seeds, are all high in natural pectin. I wasn’t sure how much of it I needed, so I just used what I had and hoped it worked. Thankfully, the zest of 3 lemons combined with their juice ended up being plenty to get this jam gelled.

macerating strawberries

The next step was to let the berries macerate in the juice and sugar until they became soft and released much of their own juices. I let them sit for about 2 hours while I ran an errand, but I think even one hour would have been plenty. I could not resist to eat a few of the sticky sweet strawberries right out of this bowl. They were incredible!

After that, it’s pretty easy to turn them into jam. I put them in a large pot and let them boil away for close to an hour, making sure to skim off any foam that formed on the top to keep it from boiling over.

boiling strawberry jam

At the very end, I mashed them up a bit with a potato masher to make it a bit smoother (better for putting in a cake so there are no chunks to make the cake layers uneven,) and then added a few tablespoons of vanilla for a sweeter, more rounded flavor. The vanilla took the tart edge off the jam, making it a “strawberries and cream” type flavor.

And here’s how you can tell when it’s done…

I put a small plate in the freezer before I started boiling the jam. You can put a small dollop of jam on the cold plate, count to ten, then tilt the plate to see if the jam is still runny, or if it moves more slowly across the plate. This jam looked ready!

testing strawberry jam

And there it is in my biggest plastic container. I don’t know exactly how much this made, but I know that I only used half of it on the cake. Now I know for next time not to make so much d@mn jam!

finished strawberry jam

Here’s the recipe for the quantity I made. You can easily half or even quarter this for your own use though. It really is excellent, I’ve been putting it on toast and yogurt all week!

Strawberry Vanilla Jam

Ingredients

  • 4 quarts strawberries (chopped small)
  • 3 cups white sugar
  • 8 tbsp. fresh-squeezed lemon juice
  • zest of 3 lemons
  • 3 tbsp. vanilla extract

Cooking Directions

  1. Stir together chopped strawberries, sugar, lemon juice, and zest in a large bowl and leave covered for at least one hour.
  2. Transfer to a heavy-bottomed pot and boil for 40 minutes to an hour, stirring frequently with a spatula and skimming foam from the top continuously to prevent over-boiling.
  3. Mash jam with a potato masher to desired consistency and add vanilla, mix thoroughly.
  4. Test jam on a cold plate for doneness. If it still runs quickly after 10 seconds on the cold plate, reduce it further by boiling for 10 or so minutes longer. If it runs slowly or not at all, it's done.
  5. Jam should stay safe in the refrigerator in a sealed container for at least a week. Freeze or can any remaining.

Next up, making 6 lbs. of buttercream and layering it with the jam between fluffy vanilla cake!

6 lbs. of buttercream

Yes, I used all 6 lbs. of frosting!