I LOVE baking, I LIKE crumb coating and frosting, but I HATE working with fondant. This stuff is so finicky and delicate and heavy and sticky. One wrong move and you’ve ruined it, and this stuff ain’t cheap. There really is no room for error.
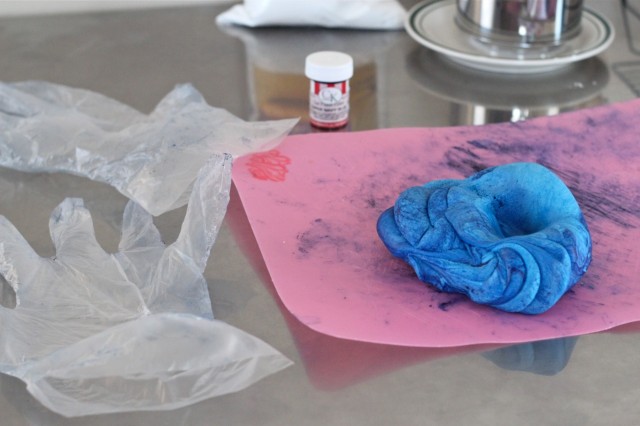
My trials with fondant began early in the week when I decided to go ahead and dye a piece that I would later be using to make striped trim around the cake. I needed to get this small chunk of fondant to a deep navy blue, and after an entire bottle of navy gel dye and a half hour of kneading and squeezing, I still had only this…
That’s decidedly not navy. It was obvious that I was gonna need a LOT more dye to reach the deep color I was looking for, so I knew I’d need to schedule time during the week to make another trip to the cake supply store for more dye.
BTW, if you’re in the Atlanta area and are in need of professional cake decorating supplies, I cannot recommend Cake Art enough. I could not believe there was an entire store dedicated to cake decorating that was only a few miles from my house. Their staff is extremely helpful and I would have been in serious trouble if I ever found myself in need of more supplies that I could only find online. They even have classes!
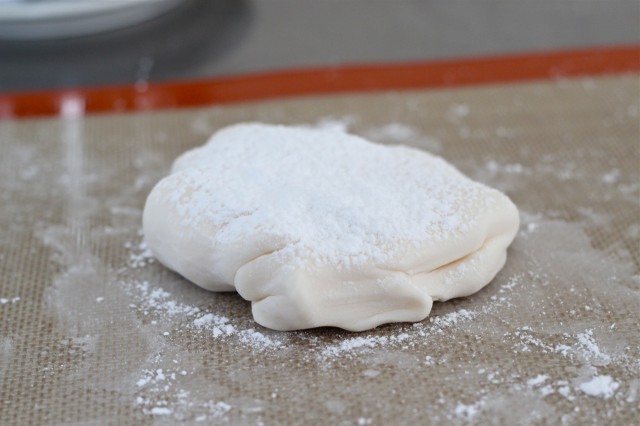
Anyway, since I couldn’t finish that project that day, I moved on to creating a bow ornament out of fondant. I can never find my preferred brand of fondant; Satin Ice, in small quantities, so I purchased this Pettinice brand instead in a 1.5 pound size. The thing about Pettinice is that it’s a lot stickier and bendier. I needed to firm it up a bit so that it would hold it’s shape well for making the bow, so I added corn starch in small batches until it felt like the right consistency.
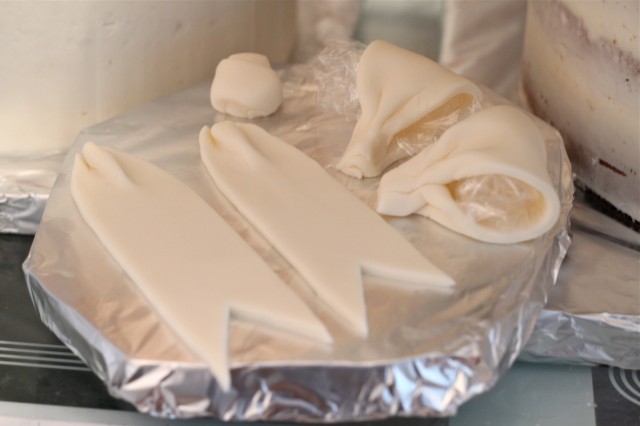
I rolled a small piece of it out on a SilPat (non-stick silicone mat) and used an exacto knife to cut out the shapes for each part of the bow. I then made some pleats in the tails and stuffed the loops with some saran wrap so they wouldn’t flatten out as they dried.
I set them on their own little board and let them set up in the fridge.
Now here’s the real fun part – covering the cakes with the fondant.
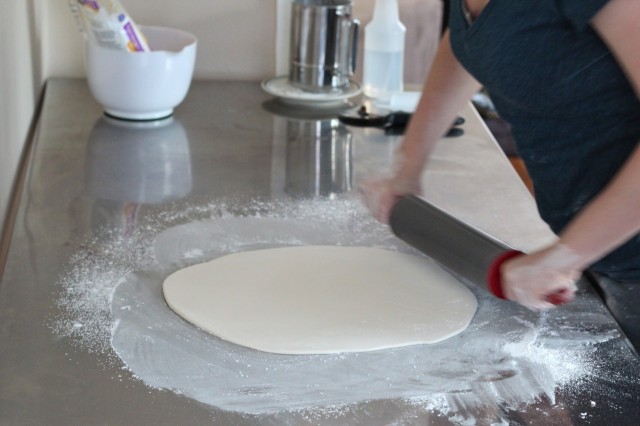
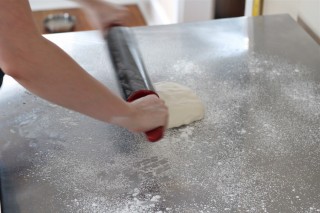
You want to first measure your cake to see how large you need to roll out the fondant. You measure across the diameter and up the sides, then add a few inches to make sure you have enough to work with. My biggest cake layer needed a circle of fondant nearly a yard across! It barely even fit on the table.
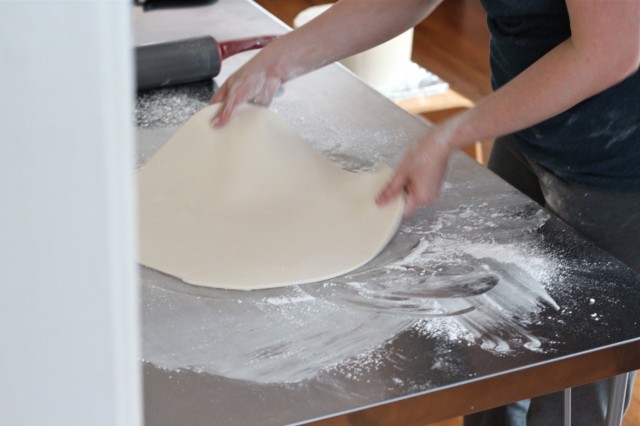
The professionals use a kind of giant pasta roller machine to make fondant sheets of a perfectly even thickness, I used my biggest heaviest rolling pin and went to town. I had to use a lot of cornstarch to keep the fondant from sticking to the table or to the rolling pin. You constantly need to be running your hand underneath the sheet to make sure it’s not sticking anywhere, and add more cornstarch if it is.
If you find any air bubbles you can pop them with a pin then roll over them a few times to squeeze the air out and smooth out the scar. Keep rotating the fondant to make a nice circular sheet. Use a yard stick to see if it’s big enough. If it’s not big enough and you’ve already got it rolled paper thin, you might have to wad it up and knead in more fondant, then start over. It’s a pain, and I got lucky this time that I had enough to work with for each layer. I still don’t know how many pounds of fondant are needed to cover different sizes of cake.
Here’s the part that absolutely kills my nerves. First, there’s getting it onto the cake without stretching or tearing it. My favorite way to do this is to put both of my arms underneath it with my palms facing up, and then lift it straight up and place it straight down on the cake. Professionals usually roll it around a rolling pin and then unfurl it across the cake. I don’t do this because I’m clumsy and because rolling the fondant when you’ve worked a lot of cornstarch into it can cause a wrinkly surface texture known as “elephant skin.” I’m looking into getting a huge silicone mat to roll out fondant on so that I won’t have to use cornstarch anymore. That’ll take care of the elephant skin problem for good.
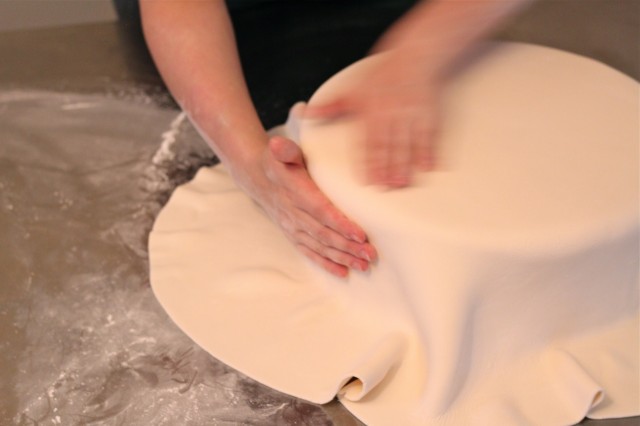
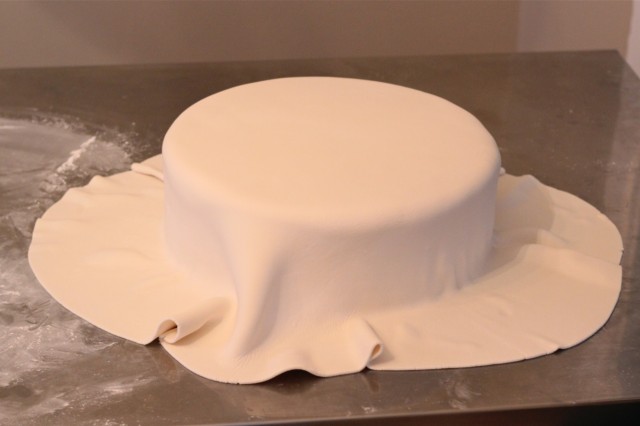
Once you get it on the cake, you need to work quickly to smooth the fondant over it seamlessly before it starts to dry out and become less pliable. This is definitely a skill that needs to be practiced to be mastered, and I am nowhere near mastering it. You can start by smoothing it across the top, then the technique is to lift the curtain of fondant up and, starting towards the bottom of the cake, you smooth it upwards with your hand. You have to keep lifting and smoothing until it’s all tucked in. Really difficult because there’s more material hanging over the edge of the cake than there is surface to smooth it onto.
That’s it almost finished, just a few more wrinkles to lift and smooth. At this point you should use a smoothing tool to get the angles really crisp. It’s basically a flat piece of plastic with a handle that you run all over the cake with light pressure. You then run it up and down the sides to make a sharp edge at the bottom. Then you can cut the excess fondant off with a pizza cutter. I always leave about and inch extra though because fondant can tend to shrink up a bit in the fridge. So once I’m sure it won’t shrink anymore I go back with an exacto knife and cut it right at the edge.
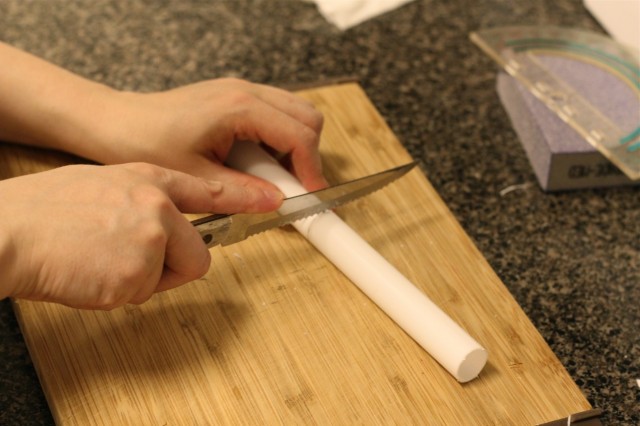
The last thing I had to do before decorating was to add the support rods. Cake is heavy. I buy these plastic dowels and then cut them to size.
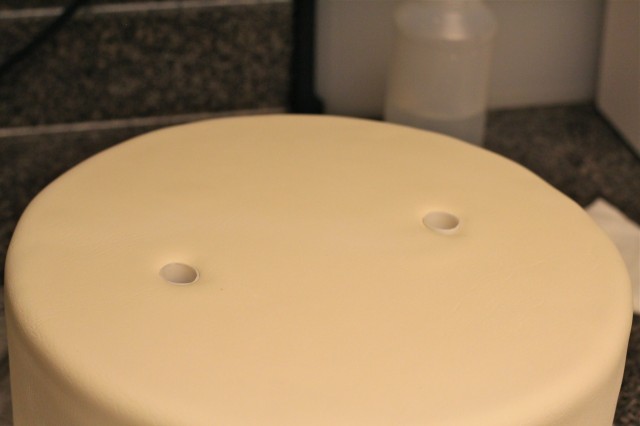
You want them to come right to the top of the fondant. Any higher and you’ll see a gap between the tiers, lower and the tier above will squish the one below. It takes a lot of adjusting to get each dowel the exact height it needs to be. You can see below that the dowel on the right needs to lose about a millimeter off the top. You wriggle it out, wipe it off, and carefully trim the edge with scissors. I finished this up around 11pm.
All that’s left to do is to decorate it and transport it to the wedding site!
Little did I know just how crazy my last morning of work on the cake would be…




Oh no, scary foreshadowing!
I’ve never bought fondant before, I’ve only made it. Which sucks, kind of. But I’ll announce to the world now that if I ever get married, my wedding cake will NOT have fondant on it. No, thank you. Got that, world?
I love your metal table. You have a great work surface! Can’t wait to see the finished product:)
Emma recently posted..rhubarb and white pine paletas
I’ve been meaning to try making marshmallow fondant at home, just haven’t had time to experiment with it. And I agree, I think fondant-less cakes are both prettier and tastier, but I understand the desire for a super-smooth look. Most people just end up peeling the fondant off before eating it anyway, I know I do. They seem to be falling out of fashion though, or at least buttercream cakes are getting more equal play time.
just the mention of fondant sends shivers through my spine. i am beyond impressed! can’t wait to see the finished product!
Laura @ Sprint 2 the Table recently posted..Ultimate Veggie Trail Mix
After watching Cake Wars my daughter wanted to make a cake with fondant… she had grand intentions…. but didn’t turn out so pretty. Didn’t taste too good either…
Good Food Good Friends recently posted..Crab Stuffed Jalapenos Peppers
That stuff is seriously hard to work with. I have a whole new respect for the professionals in the industry, it really is a skill and every time I use it I’m reminded that I still have a lot to learn. And yeah, it tastes pretty fake, like eating sugar paste.
What does fondant taste like?
Well, like sugar, but like really fake sugar. It’s the texture that’s so off-putting more than anything though. Thick and pasty, almost enough to be chewy.
The fondant in the top photo looks like a beautiful magical sea creature. So smooth! So smooth! Well done. I’ve only used fondant once, back in Year 10 making a Christmas Stocking cake, and golly. That thing was a … naughty word.
You know, I can like it a little better if I imagine it as a graceful jellyfish-like creature. That should be just the boost I need to keep from chucking the stuff out the window.
That, and the fact that it would probably kill someone on the street if you threw it out the window.
Hannah recently posted..Chocolatepalooza: Araya Artisan Chocolate and Redstone’s Old New Orleans Chocolate
In an attempt to contribute to an upcoming baby shower, I decided to try my first decorated cake (ever!). I found a diy Marshmallow fondant recipe and it actually turned out okay! I didn’t have hardly any of the appropriate tools but it was certainly worth a try! It also tasted better since it was ‘mallows, confec. sugar, and I added some clear vanilla extract. Loved your post!
Thanks Jenny! I really ought to try making my own fondant sometime. I’m sure the stuff I’m buying pre-made is nowhere near as good as homemade.
Pingback: Crusting no-melt buttercream of my dreams and my favorite vanilla cake | Thyme Bombe
The MMF fondant that I found on Artisan Cake Company is so Delish and very easy to work with and cheaper. Maybe give this one a try. Love your jam recipe. Thanks for all your postings.
http://artisancakecompany.com/tutorials/lmf-fondant-recipe/
I make marshmallow fondant and it tastes much better than the stuff you buy. It’s a good arm workout! Very sweet though. I still prefer buttercream.