Skip to Content

tag

Tag Archives: breakfast

post

Healthy breakfast popsicles: 2 ways

One thing I’ve learned about pregnancy is that regardless of the weather, you’re hot all the time. I’m a bit embarrassed to admit just how much gelato I’ve consumed in the last few months. Enough to build a slip ‘n slide for a penguin, probably.

After rolling out of the hot bed in the morning, taking a hot shower, putting on hot clothes, and drying my hair with my portable hot-blasting device, I want nothing less than a hot breakfast to top it all off. I caught myself one morning, over an already cool enough bowl of fruit and yogurt, wishing that I could have the same thing for breakfast only frozen. My eyes nearly popped out of my head as I realized that this was a wish I could easily grant myself. And so, I sought to make myself a batch of healthy breakfast popsicles…

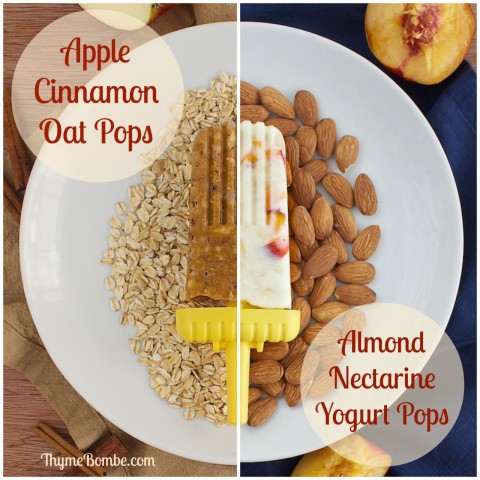
Healthy Breakfast Popsicles: 2 Ways - Apple Cinnamon Oat Pops and Almond Nectarine Yogurt Pops

This is stuff I already eat for breakfast regularly, just in frozen form. A bowl of oatmeal with mashed banana and applesauce or fruit and nuts in creamy yogurt. Entirely healthy and so, so soothing in the summer heat.

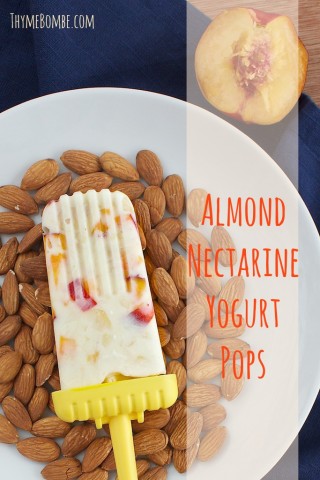
Almond Nectarine Yogurt Pops

I chose almonds and nectarines for these yogurt-based popsicles because that’s what I had on hand (and because I’m having a bit of an almond obsession right now.) Feel free to substitute any fruit, nuts, or flavored yogurt that you wish, but this combination really was stellar and I found myself making another batch immediately after I inevitably ate all of these in just a few days.

Almond nectarine yogurt pops

Yogurt, fruit, and nuts makes a healthy breakfast that is refreshing when frozen.

Prep Time: 10 minutes

Total Time: 10 minutes

Yield: Makes 6

Ingredients

  • 2 containers (12 oz.) lemon Chobani yogurt
  • 2 small nectarines (diced small)
  • 1/2 cup sliced almonds
  • 2 tsp. honey
  • 1 tsp. almond extract

Cooking Directions

  1. Stir all ingredients together in a small bowl.
  2. Spoon mixture evenly into popsicle molds and insert handles.
  3. Freeze for at least 4 hours or overnight.
  4. To eat: Run mold under warm water until popsicle slides out easily.

Another favorite of mine is oatmeal bulked up with a mashed banana and sweetened with applesauce. I was worried that the texture of the oatmeal wouldn’t work very well frozen, but they came out just delightful. They’re a bit chunkier than the yogurt pops, but still break apart easily and dissolve in your mouth.

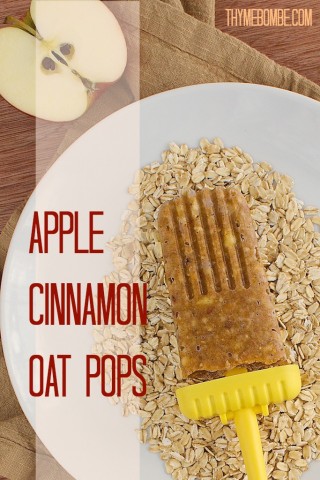
Apple Cinnamon Oat Pops

Again, chose your own adventure here. If there’s a flavored oatmeal you’d like to use, go for it. If you’d like to substitute jam or nut butter for the apple sauce, be my guest. You could even use canned pumpkin in place of the mashed banana… mmmmm.

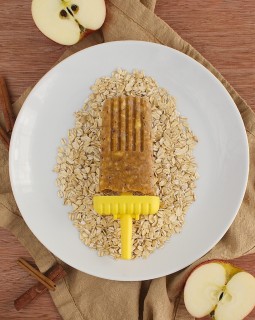
Apple cinnamon oat pops

Just like a hearty bowl of hot apple cinnamon oatmeal, but in frozen form.

Prep Time: 10 minutes

Total Time: 10 minutes

Yield: Makes 6

Ingredients

  • 2 individual packets plain instant oatmeal
  • 1 medium banana
  • 1/4 cup apple sauce
  • 1/4 cup almond meal
  • 1/4 cup almond milk
  • 1 tsp. cinnamon
  • 1 tsp. honey

Cooking Directions

  1. In a microwave-safe bowl, cook oatmeal with water according to package directions.
  2. In a separate bowl, mash banana with a fork. Add oatmeal and all other ingredients and stir to combine.
  3. Spoon mixture evenly into popsicle molds and insert handles.
  4. Freeze for at least 4 hours or overnight.
  5. To eat: Run molds under warm water until popsicle slides out easily.

I’ve loved being able to grab one of these in the morning to cool off with. They’re pretty low-calorie, so I usually follow them up with a muffin or something. I already have so many ideas for how to freeze more of my breakfasts now. Blueberries and waffle bits in maple yogurt? YES.

Apple Cinnamon Oat PopsAlmond Nectarine Yogurt Pops

How would you translate your favorite breakfast into a frozen treat?


post

Blueberry buckwheat scones

Today I’m trying something a little different. My friend Heather of Better With Veggies hosts a regular recipe link-up on her blog called Meatless Mondays from A to Z, where each week there is a theme ingredient chosen by its correlating letter of the alphabet. I watched the first round of MMAZ as I was writing my book and wished that I could participate, but I had no time to blog back then and this little site sat unloved for around 6 months. Luckily, Heather has decided to bring this popular link-up back for another round! I’m totally in this time.

This week, we’re on B, which has us utilizing blueberries. I missed A (for avocado) while planning for a recent vacation Jeff and I took, so I’m very eager to jump in and contribute this week!

Better With Veggies

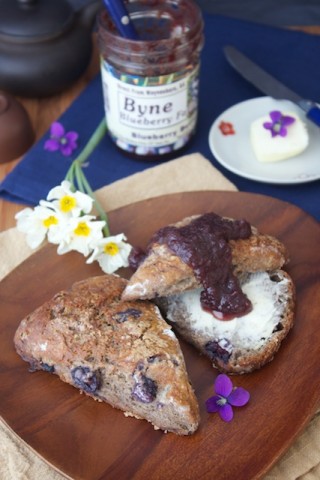
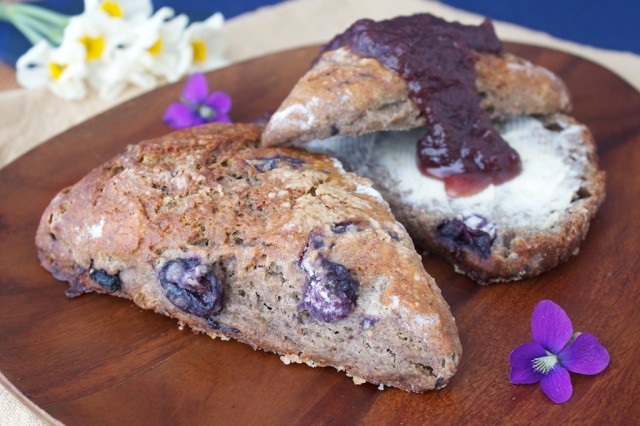
Over the weekend, I tested this recipe for blueberry buckwheat scones, my first time ever making scones! I was so worried they would fail, but thankfully they came out perfectly crumbly, the nutty buckwheat base studded all over with huge juicy blueberries. I’ve been eating them sliced in half and slathered with a thin layer of butter and a little bit of blueberry jam. So good!

Blueberry buckwheat scones

Buckwheat flour, also known as soba flour in Japan, is a dense and nutty grain flour with a subtle natural sweetness. This is the same flour used in making soba noodles, which are most commonly served cold with a salty dipping sauce on the side. You pick up a big clump of noodles with your chopsticks, dunk them in the hot soup, and slurp them up making as much noise as you want! Soba has such a beautiful color- it’s kind of grey, almost purple sometimes. So pretty paired with the bluish-purple blueberries in these blueberry buckwheat scones.

Blueberry buckwheat scones

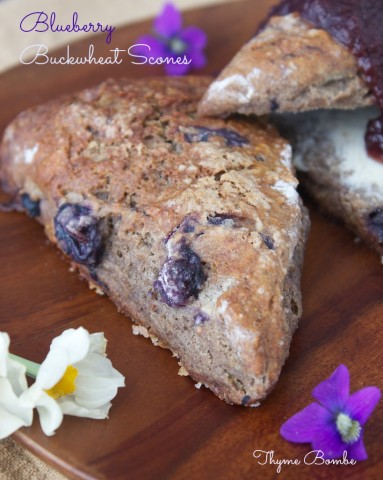
Blueberry buckwheat scones

Nutty buckwheat scones bursting with blueberries is a unique twist on this breakfast pastry classic.

Prep Time: 20 minutes

Cook Time: 40 minutes

Total Time: 1 hour

Yield: 8 scones

Ingredients

  • 1 and 1/4 cups* all-purpose flour
  • 1 cup buckwheat (soba) flour
  • 4 tbsp. sugar
  • 2 and 1/2 tsp. baking powder
  • 1/2 tsp. salt
  • 5 tbsp. cold unsalted butter
  • 1 large egg
  • 6 tbsp. cold milk
  • 1 cup frozen blueberries
  • + extra milk to brush top of scones
  • + extra sugar to sprinkle over scones
  • + extra flour for kneading dough on

Cooking Directions

  1. In a large mixing bowl, whisk together the buckwheat flour, sugar, baking powder, salt, and 1 cup of the all-purpose flour. Reserve the other 1/4 cup of all-purpose flour to use only if dough ends up too moist.
  2. Cut butter into small cubes and add to the dry mix, along with the milk and egg. Use a fork or potato masher to cut butter into the dough. Dough will be very dry and crumbly and seem like it won't come together completely.
  3. Rinse blueberries under cool water to remove any frozen juice on them. Use while still frozen, do not allow to thaw fully.
  4. Add blueberries to the dough and fold in with your hands. As you mix, some of the berries will burst and the juice will help the dough become moist enough to come together. If it is very wet by the time you get them incorporated, add the reserved 1/4 cup of all-purpose flour and mix in.
  5. Transfer dough onto the counter or a cutting board dusted liberally with flour. Dust surface all over with flour and pat into a circle shape.
  6. Cut dough into 8 wedges and transfer to a parchment-lined baking sheet. Brush each scone with milk and sprinkle with sugar.
  7. Bake scones for 35 to 40 minutes in a pre-heated 400F degree oven. Allow to cool before serving with butter, clotted cream, or jam.

I learned a few things about properly making scones in testing this recipe that I’ll share with you to help you make a tasty scone on your first try. As I was mixing the wet ingredients into the dry, I thought there was no way there was enough moisture to hold it all together and I started to second-guess my recipe. Once I added the berries though, they released so much juice into the dough that it became far too wet and sticky in an instant. Again, I feared that I’d ruined them. I simply added an extra 1/4 cup of flour, and they came together enough to feel good about trying to bake them.

Scone dough should be relatively dry. If it can’t hold its shape when patted into a circle, it’s just too wet. Don’t be afraid to add flour until it comes together into a ball. You also want to use cold butter to give it that irresistible flakiness upon baking and not mix with your warm hands too much for fear of melting the butter into the dough. A brush with milk on top adds a bit of protein to brown up in the oven. If you’ve done everything correctly, the scones should be crisp and brown on top, dry but tender in the center, and not very sweet at all. They’re a bready base for slathering on your favorite biscuit toppings.

Blueberry buckwheat scones

Very excited to be able to participate in Meatless Mondays from A to Z this round. Thanks Heather for bringing it back! No idea what I’ll make with cabbage when it’s time to move on to letter C.

Have you ever baked with buckwheat flour?


post

Broiled grapefruit with ginger sugar

Ok, I need a break from talking about the book for a while. I’m sure you guys are ready for something new too. šŸ˜‰

Who’s ready for spring?!! I don’t know about you guys but I am counting down the days until short sleeves, sunny walks, and refreshing warm-weather fruits. I’m craving berries. Every time I go to the farmer’s market and pass the table packed with those little green plastic cartons overflowing with plump red strawberries, I have to force myself to keep walking and not fall for their ruse. It is not berry season. Those strawberries will be watery and sour and unsatisfying.

Right now I’m combatting this need for refreshing fruit flavors with the last of winter’s citrus. I just annihilated an entire red grapefruit with lunch, sliced into wedges like an orange, making little smiles of rind as I chomp down on each one. I never eat grapefruit like that for some reason. I always see grapefruit served so preciously, either sliced into thin naked supremes on top of a fragile salad, or as I’ve chosen to serve it in the recipe I’m sharing with you today – broiled with a sugary crust, each shining bite precisely carved out with a sharp little spoon.

sliced grapefruit

But you guys know I can’t just broil a grapefruit and be done with it, right? I’ve gotta find a way to insert one of my favorite asian flavors in there somehow. This is a common springboard for me as far as recipe creation goes – I take an already delicious food and make it marvelous with a fun new flavor.

This time, I’ve used spicy grated ginger to balance with the sweet sugar andĀ bitter grapefruit. I debated for a long time wether or not to feature ginger as one of the highlighted ingredients in The Japanese Pantry, and ultimately decided to let it play a supporting role instead. It certainly shines in this recipe though.

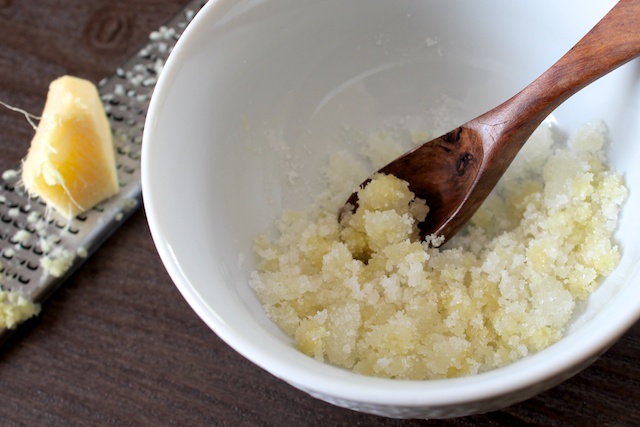
ginger sugar

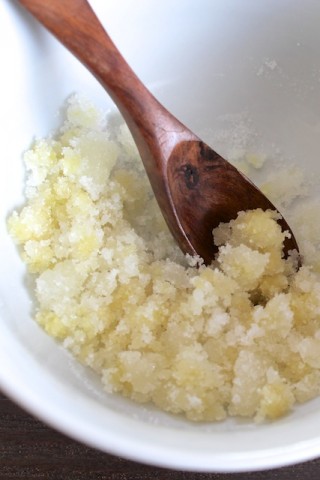
I loved the smell of the ginger sugar as I was making this. The fresh wetness of the grated ginger soaked right into the sugar, lightly dissolving it into the texture of wet sand. It makes a grainy slushing sound as it mixes together, like the sound of walking through melting snow.

ginger sugar

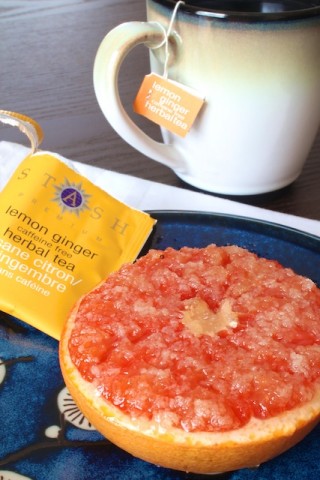
I ended up broiling this in a toaster oven. I tried it once before in a regular oven and the fruit was too far from the heating element, it just kind of melted rather than caramelizing. This time though, the toaster oven crisped the topping up nicely and just barely browned the edges. I love how the fruit blisters in the heat and bulges up out of the rind. The ginger flavor was definitely present but not at all overpowering.

Broiled grapefruit with ginger sugar

I must confess though, that even with this typically “precious” presentation, it was not eaten daintily. I hacked it up with my blunt little spoon before turning it inside out and biting the rest off in big chunks until only a ragged pithy peel was left. It definitely satisfied my desire for summery flavors. I see myself having this bright little breakfast weekly until my beloved berries are finally ready.


Broiled grapefruit with ginger sugar

Gingery sugar encrusts juicy bitter grapefruit for a sweet and lightly spicy treat.

Prep Time: 3 minutes

Cook Time: 12 minutes

Total Time: 15 minutes

Ingredients

  • 1 medium red grapefruit
  • 2 tbsp. white sugar
  • 1 tsp. freshly grated ginger

Cooking Directions

  1. Slice grapefruit in half, remove any large seeds, and place cut side up on a heat safe dish or tray lined with aluminum foil.
  2. In a small bowl, mix together ginger and sugar until it is the texture of wet sand.
  3. Top each grapefruit half with half of the sugar mixture and pat with the back of a spoon to spread it out to the edges.
  4. Toast in a toaster oven for 12 minutes or until bubbly and lightly browned. (The toast setting on my toaster oven only goes up to 6 minutes, so I just left it in for 2 cycles.)


Are there any spring and summer foods you’re desperately craving?


1 2 3 4 5 6 7 8 9 10 ... 15 16   Next Page »