Skip to Content

tag

Tag Archives: japanese

post

Japanese sweet potato casserole

So, I may have promised to share my recipe for the Japanese sweet potato casserole I brought to the blogger potluck over the weekend. It was intended as a recipe for my cookbook and it will still appear in the finished version, but I suppose I could give this one away early as kind of a teaser. 😉

It really couldn’t be simpler, but yields an impressive result. If you can make mashed potatoes, you can definitely put together this delicious Japanese take on the traditional Thanksgiving classic.

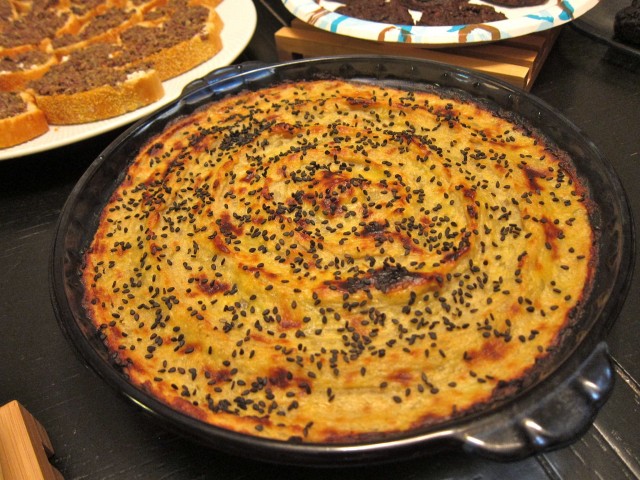
My Japanese sweet potato casserole for potluck

Japanese sweet potato casserole

A Japanese interpretation of the classic Thanksgiving side dish featuring the subtle sweetness of Japanese sweet potatoes.

Prep Time: 25 minutes

Cook Time: 20 minutes

Total Time: 45 minutes

Ingredients

  • 2 very large Japanese sweet potatoes
  • 4 tbsp. butter
  • 1/4 cup sugar
  • 1/4 cup milk
  • 1 tsp. cinnamon
  • 2 egg yolks
  • sesame seeds for garnish

Cooking Directions

  1. Peel potatoes and chop into small pieces of roughly the same size.
  2. Boil potatoes until tender (approximately 15 to 20 minutes.) Drain and pour into a large mixing bowl.
  3. Mash with butter, sugar, cinnamon, and milk while still warm. Allow to cool, then mix in one of the egg yolks.
  4. Pour into a 9 inch round or square baking dish and use the back of a spoon to make a design of your choosing on the surface.
  5. Break apart the remaining egg yolk with a fork and brush the entire yolk over the surface of the casserole being careful not to flatten the design. Sprinkle on sesame seeds if desired.
  6. Bake for 10 minutes at 350 degrees to heat it through then put under the broiler for up to 10 minutes to brown the top.

This recipe was actually inspired by a type of Japanese candy known as a “wagashi.” Wagashi are small individual-sized desserts that are traditionally served with tea. Typical flavors include mashed chestnuts, green tea, several varieties of sweetened beans, dried fruits, steamed squashes, and also sweet potatoes.

One common wagashi is the suito poteto, which of course refers to the fact that it is made from sweet potatoes. The potatoes are steamed, mashed, lightly sweetened with sugar, formed into a ball, glazed with egg yolk, and then baked. I’ve used a similar process and ingredient list to make this Japanese sweet potato casserole reflect the suito poteto wagashi, but added cinnamon to tie it together with the Thanksgiving dish of sweet potato casserole.

Japanese sweet potato casserole

I’m starting to see Japanese sweet potatoes, also known as satsuma-imo, popping up in regular grocery stores everywhere. They have reddish purple skin and pale white flesh and come in varying shapes and sizes. They’re a bit starchier and harder to cut than regular sweet potatoes and are a little less sweet, but they can be used in any way that you would normally use a regular sweet potato. I’ve had success mashing them, roasting them, even making thick-cut fries. They’re not too bad baked whole and slathered in butter either. 😉

If you see them in your local grocery or market give them a try, whether you use my recipe for Japanese sweet potato casserole or one of your own!

Update! This recipe can be found in my cookbook, The Japanese Pantry, along with other fun Japanese fusion foods such as crispy “popcorn” edamame .

post

Tsukimi nabe

It’s lovely out right now. Drippy, gray, and blustery. Maybe most people hate rainy days but I love em’.

I’m on my fifth cup of tea and listening to the hollow patter of the heavy raindrops hitting the roof and echoing through the attic. The air smells metallic and has a weightiness to it that hangs heavy on my shoulders. I should avoid contact with anything soft such as the couch right now or I might just collapse right into it and never get up.

It’s days like these when I want nothing more than to sip on warm broth. Sometimes I wish I’d catch a cold just so I can watch movies on the couch all day while wrapped up in a giant fuzzy blanket and sipping on a bowl of chicken broth with rice and swirls of cooked egg.

This tsukimi nabe was made to be enjoyed on a day just like this.

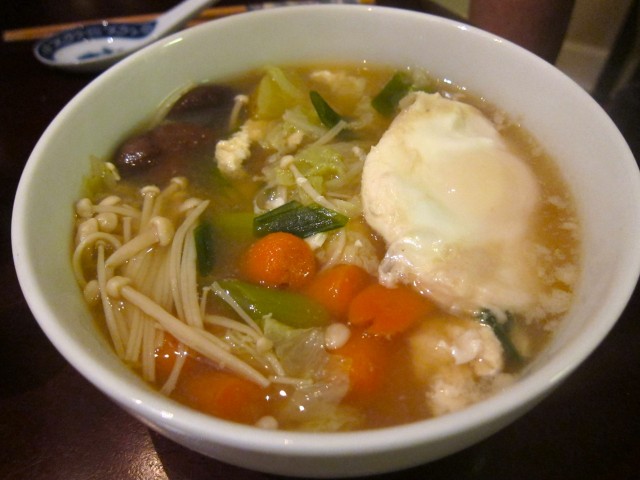
Tsukimi nabe

Tsukimi means “moon-viewing” and is a reference to the addition of an egg to the soup right at the end of cooking. The bright yellow yolk symbolizes the full moon. With a rich broth full of tender vegetables, it is a wonderful meal for a dreary day.

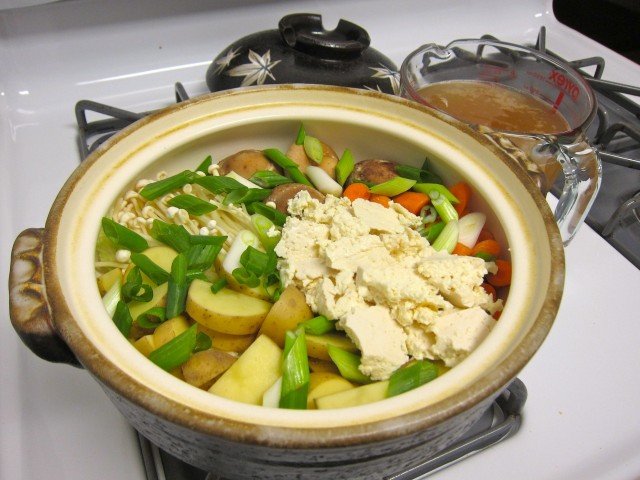
I started by placing all my ingredients in the donabe. If you don’t have one it’s no problem; you can make this in any lidded pot, I’ve even made a soup like this in a baking dish covered with aluminum foil and baked in the oven.

Tsukimi nabe ingredients

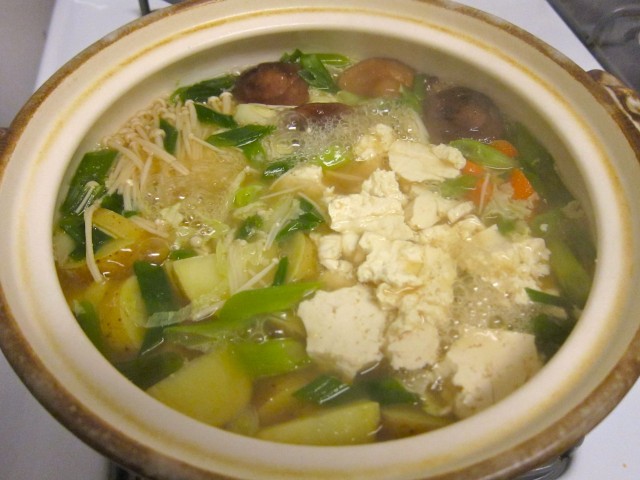
Layered on a bed of napa cabbage are clusters of shiitake mushrooms, enoki mushrooms, carrots, yukon gold potatoes, soft tofu, and a sprinkling of scallions.

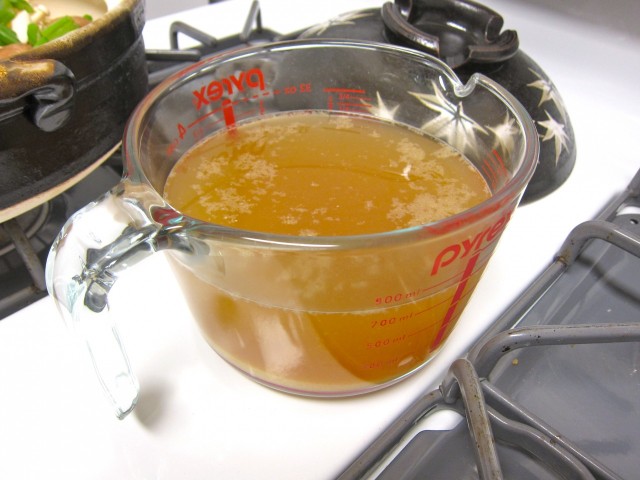
The broth is just water flavored with white miso, mirin, fish sauce, soy sauce, and hondashi, which is a dried form of dashi stock.

Tsukimi nabe broth

You pour the broth over everything else and turn the heat up to simmering with the lid on. After about 15 to 20 minutes, check the potatoes and carrots with a small knife, if they’re as soft as you like them then it’s done! The last thing to do is turn off the heat and crack an egg or two over the top, then just clamp on the lid for a few minutes to let the eggs set.

Tsukimi nabe simmering

The eggs in this nabe were still runny in the middle and when broken open they added a creamy richness to the hot broth.

Tsukimi nabe

The great thing about this dish is you can use whatever vegetables you want or have on hand, as long as there’s a soft egg cracked on top it’s still a tsukimi nabe!

Tsukimi nabe

This "moon-viewing" hot pot features golden-yolked eggs cracked over a hot and satisfying soup of vegetables and soft tofu.

Prep Time: 15 minutes

Cook Time: 15 minutes

Total Time: 30 minutes

Yield: 3 to 4 servings

Ingredients

  • 1/4 of a large napa cabbage
  • 4 to 6 shiitake mushroom caps
  • a small bunch of enoki mushrooms
  • 2 chopped carrots
  • 1 to 2 small yukon gold potatoes
  • half a block of soft tofu
  • 3 large scallions
  • 3 cups water
  • 1 tbsp. white miso
  • 1 tbsp. hondashi
  • 1 tbsp. mirin
  • 1 tbsp. fish sauce
  • 1 tsp. soy sauce
  • 2 eggs
  • sesame seeds and togarashi to garnish

Cooking Directions

  1. Press the extra moisture out of a half block of soft tofu.
  2. Cut vegetables into bite size pieces and arrange over a bed of napa cabbage in the donabe, break off pieces of the tofu and add in as well.
  3. Heat water and miso in the microwave or over the stove until warm, whisk to break up miso completely. Add the other liquid ingredients to the broth.
  4. Pour broth into donabe and cook on medium high heat with the lid on for 15 to 20 minutes or until potatoes and carrots are tender.
  5. Turn off the heat and crack eggs over the top of the soup, put lid on and wait a few minutes for the eggs to set before serving.

After photographing, I topped the soup with some toasted sesame seeds and a sprinkle of spicy togarashi seasoning. I could really just drink that broth straight out of a mug though, which I may just do since there are plenty of leftovers and it’s still drippy out.

What is your go-to comfort food for a rainy night?

post

Toasted seaweed and brown rice onigiri

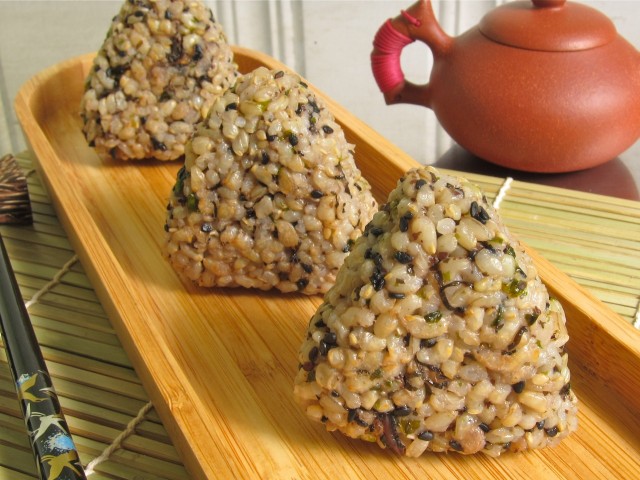
Onigiri are the quintessential Japanese snack food. In essence, they’re little more than compressed rice, but with the addition of spices and other mix-ins they can become exciting in their endless permutations.

Row of onigiri

These are great to make with leftover rice from a meal to avoid waste, or you can do what I did and make a whole batch just for snacking. :)

First, you need rice. I made 2 cups of brown rice using a rice cooker. If you’re not using a rice cooker, I would suggest using this sushi rice recipe. Since this is brown rice instead of the white rice used in the recipe, soak the rice first for an hour and then cook it for an hour.

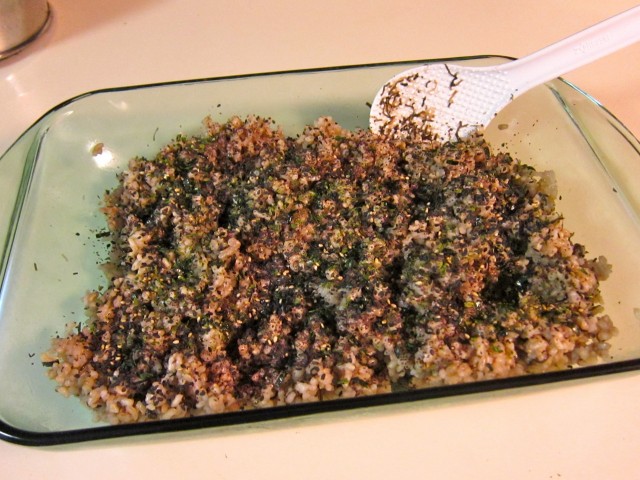
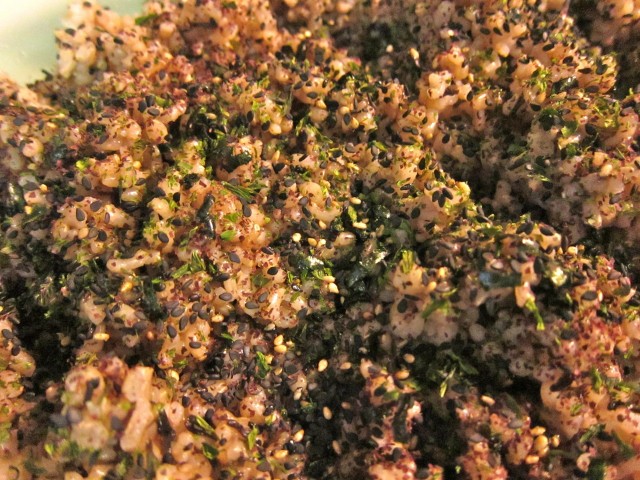
I put the rice in a wide baking dish to cool off while I applied a seasoning of salt, mirin, and rice vinegar. Then I added the seaweed on top.

Mixing seaweed into brown riceSeaweed brown rice

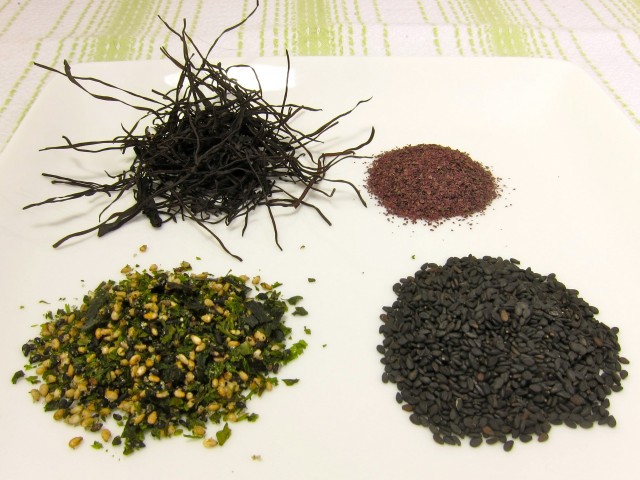
I used a mixture of 4 things in this seaweed seasoning: dried arame, dulse, nori-kome furikake, and black sesame seeds.

arame, dulse, furikake, black sesame

Make sure to soak the arame until pliable, at least 15 minutes. Then just mix it all in evenly and get ready to mold the rice into tight little triangles!

Run your hands under the faucet to get them soaking wet. This will keep the rice from sticking to your hands. Scoop up a full handful of rice and compress it into a ball. Don’t give it your worst death grip, just press enough to keep it together.

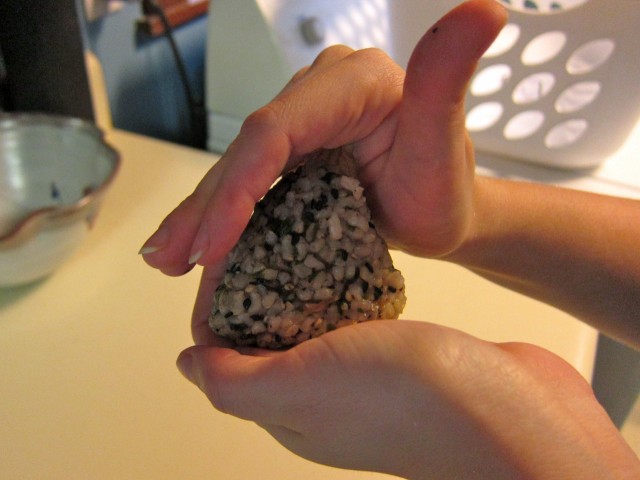
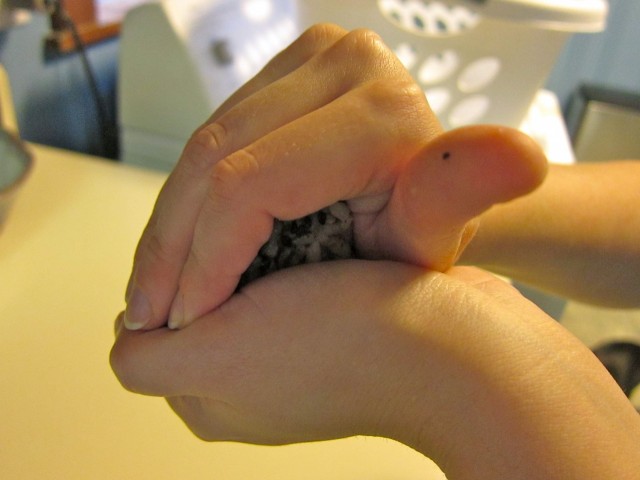
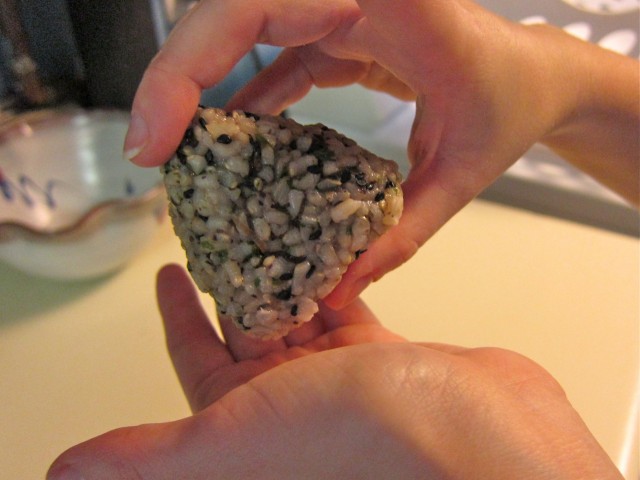
Now the fun part. With the ball of rice in your left palm, cup it so that your fingers and palm make the flat sides or “faces” of the triangle while forming your right hand into a peak shape to make the top of the triangle.

Form hand into triangle

Press all over in this position, then rotate and press again. Once more and you should have the signature triangle onigiri shape!

Press into triangleTurn and press again

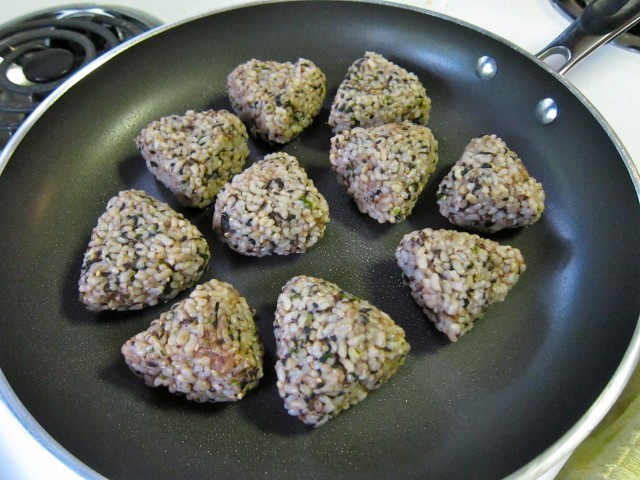
Now that you have all of your onigiri formed, you can choose to eat them as-is or toast them like I did. Lightly spray a non-stick pan with a flavorless oil such as canola and add the onigiri.

Toast onigiri

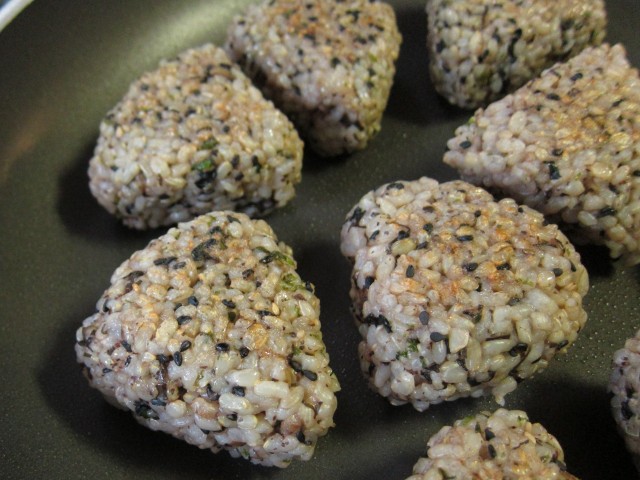
Flip them once they get to a golden brown, about five minutes on each side. Not too much longer than that or they’ll get a crust on them that’s hard as a rock.

Toasted onigiri

That’s all there is to it. You can store these in the refrigerator for a very long time, just keep them covered to keep them from drying out. They make great additions to school lunch boxes and are a tasty vegetarian sushi alternative.

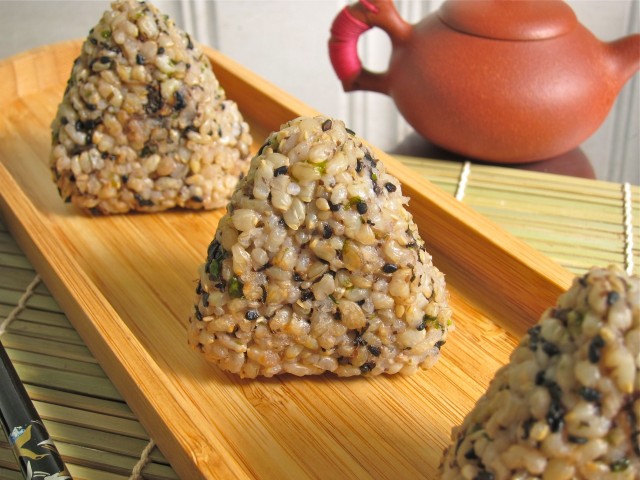
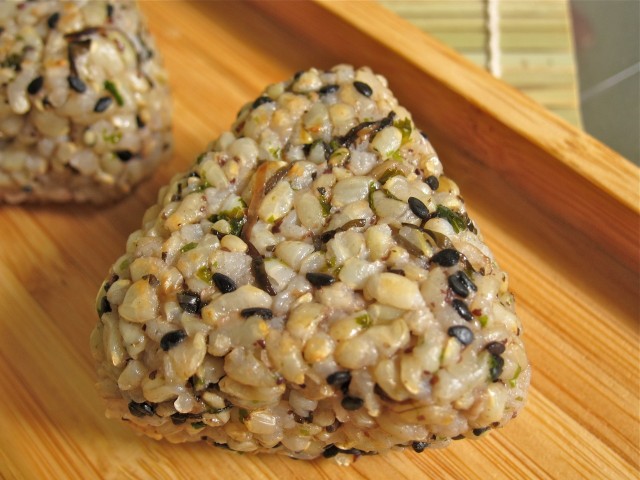
Onigiri textureSeaweed and brown rice onigiri

You can put any seasonings you want in these. If seaweed is not your thing, try flaked salmon or crumbled bits of hard boiled egg. Throw in leftover used tea leaves or eat them completely plain, dipped delicately in soy sauce.

Toasted seaweed and brown rice onigiri

A healthy snack of brown rice seasoned with seaweeds.

Prep Time: 20 minutes

Cook Time: 35 minutes

Total Time: 55 minutes

Ingredients

  • 2 cups brown rice
  • 1 tsp. mirin
  • 1 tsp. rice vinegar
  • big pinch of salt
  • 2 tbsp. black sesame seeds
  • 1 tbsp. nori-kome furikake
  • 1 tbsp. dried dulse flakes
  • 1 handful crushed and soaked arame seaweed

Cooking Directions

  1. Cook brown rice in rice cooker or on stovetop.
  2. Mix together salt, rice vinegar, and mirin. Pour over hot rice and toss to coat.
  3. Add in soaked arame, dulse, furikake, and black sesame. Toss to combine.
  4. With soaking wet hands, pick up a handful of rice in your left hand. Form your right hand into a peak shape and press on top while pressing on the sides with your left hand. Rotate 2 times to form a triangle.
  5. If desired, toast the onigiri in a lightly oiled pan until lightly browned on both sides.

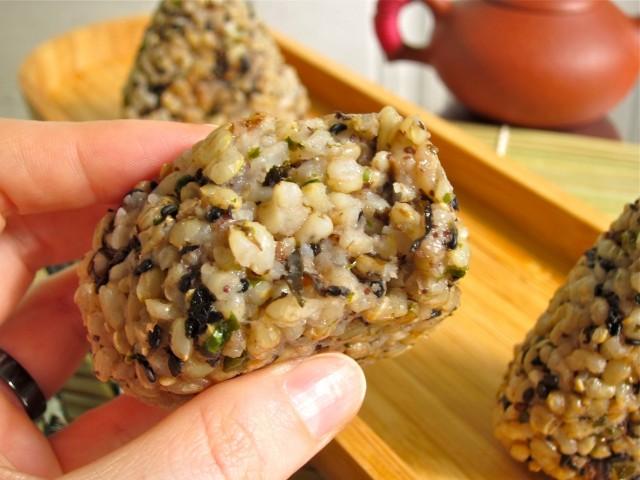
Onigiri bite

Delicious and healthy!